
The pleasantness of a home relies heavily upon its walls. Usually, the next step after removing the old wallpaper is fixing the drywall that has also been ripped off. All that effort stripping the wallpaper likely left wrinkles and dents on your walls because no primer or plaster was used on the initial installment of the wallpaper.
Drywall mending can be addressed with a few materials, a drywall/joint compound, and patience. Here's a guide to instruct you how to repair drywall damage.
How To Repair Damaged Drywall
Make sure that you have the tools and materials needed for the job, such as:
- Paint roller and brush
- Drywall knife
- Taping knife
- Trowel
- Shellac-based or oil-based primer/sealer
- Wallpaper paste remover
- Vinegar
- Sponge
- Cloth
- Sandpaper of various grit sizes
- Joint compound
Clean the Walls and Remove Loose paper
It is vital to ensure that you deal with all the residue. Clean the wall with a wallpaper paste remover or a mixture of 1 part vinegar to 4 parts water to clear all the glue lumps. Don't saturate your walls; you will only add to the problem if you overdo it.
Then, with a drywall knife or solid utility knife, scrape off traces of some loose brown paper, or the loose edges of the wallpaper.
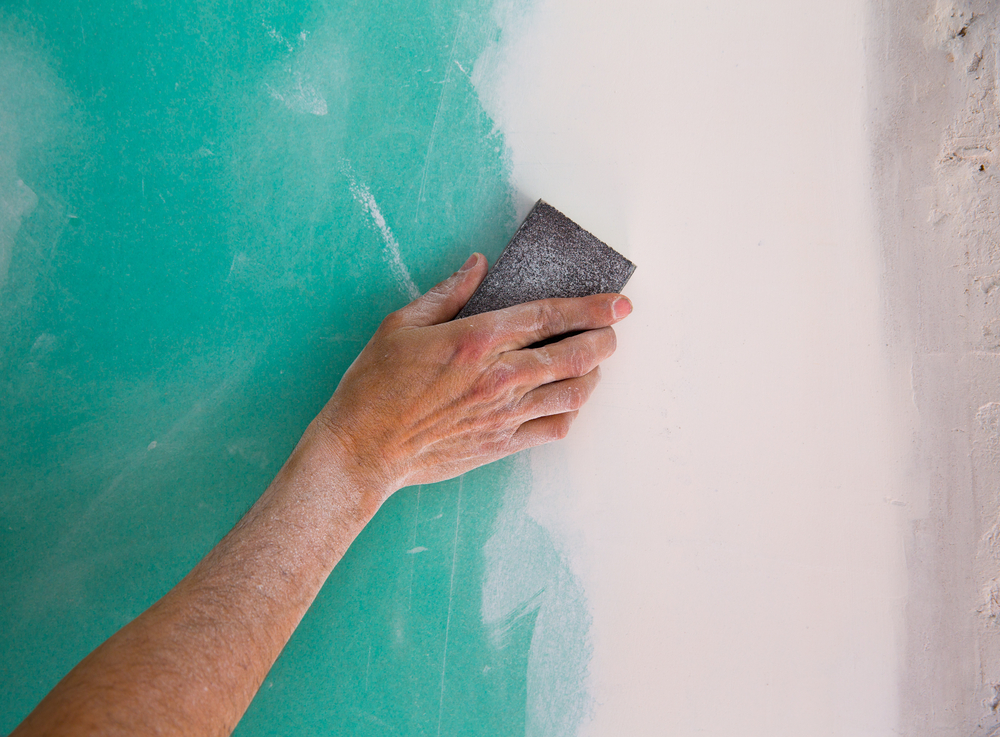
Sand The Ripped Drywall
Smooth the rough areas of the drywall surface or plaster with medium-grit sandpaper, then lightly sand with a fine-grit sandpaper. This will create a smoother foundation for the drywall/joint compound. Wipe the sanding dust with a clean cloth.
Apply The Drywall Compound
Cover any grooves and drywall damage with a couple of applications of joint compound, available from any hardware store. You may use a short, broad putty knife, but a drywall knife is much better to spread the joint compound a few inches past the borders of the damage so you can sand it level with the facade once you're finished. Try to prevent leaving creases or huge lumps.
Allow the compound to fully dry for about a day before sanding it down.
Sand The Fixed Areas
Sand the walls with an electric sander (make sure to wear a dust mask). Use a fine 100-grit sandpaper and a sanding block to smooth off the surface.
If the wall is still dented or uneven, remove all the dust from the wall, then spread another coat of joint compound. Then polish it off with a fine-grit 180 sandpaper after waiting the suggested length of time again.
Apply Primer
Once the entire wall is completely dry, use oil- or shellac-based primer. This coat of primer creates a smooth surface for your paint to adhere to and ensures an even finish.
Another Method To Fix Damaged Drywall Paper
If the damage to your drywall after removing wallpaper is extensive and severe, a simple patch job might be insufficient. Another critical measure in this process that frequently gets neglected is skim coating.
What Is Skim Coating?

Skim coating is a technique that hides imperfections and eases damaged walls and ceilings by applying a thin application of joint/drywall compound (or drywall mud). The skim coating process is closer to drywall finishing than priming or painting because of the needed two-skim coats for the best results.
How To Skim Coat Drywall
- Scrape away the remaining wallpaper bits and torn drywall paper. Cover up areas that will not be skim-coated.
- Apply the first coat of joint compound with a roller. Spread the mixture thinly (at least 1/32 inch). Be consistent across the surface.
- Smooth the mud with a taping knife or trowel. Then allow the first skim coat to dry completely.
- Apply a second coat over the entire surface to blend the missing-paper area with the surrounding drywall material.
- After the last coat dries, sand the wall with fine-grit paper.
Hire Wallpaper Removal Professionals!
Repairing the drywall after you remove wallpaper is essential. The problem may reappear after installing the new wallpaper or painting if left unaddressed. But it's a project that is backbreaking, and taking on such a project on your own might not be a great idea if you lack expertise. Although you enjoy working on things yourself, this big job usually becomes more complex, and even tiny missteps can slow you down immensely.
Therefore, it's best to ask the help of an expert. Apex Wallpaper offers wallpaper removal and installation across Toronto, Ontario, CA. Our methodic wallpaper installation services prevent damage to the underlying drywall, and our preparation and installation services recover your wall with no massive clutter and complications.
Call us at 416.833.1662 for more information on our services, or email info@apexwallpaper.ca
Quotes or an estimate can be provided at request.
DIY projects are a great way to customize and decorate a home or space, especially when you're on a budget. If you're looking for an alternative way to decorate furniture or spruce up your dull tables and wardrobes, wallpaper is a material to have on hand.
As strange as it may appear, patterned wallpaper isn't only for walls. Decorative paper can actually be a fun and creative way to rejuvenate your pieces of furniture or your doors without breaking the bank. Whether you have excess paper lying around, redoing your space and need a pop of colour, or are looking for a focal point, this is your sign to get your furniture looking its best!
Getting Ready To Decorate Furniture
So you've decided that you want to wallpaper your wood furniture and bring it new life with this great project, but now you don't know where to start. Like with any other DIY project, one of the first things you should do is look for inspiration before you start creating.
Find Your Inspo
What do you want your furniture to look like? What colours, patterns, or styles are you looking for in your room? Do you want to work with glass or wood? What's the right wallpaper for your aesthetic? Do you have a specific colour palette in mind? Are you looking to upcycle a dresser, wardrobe, or table? Looking through DIY blogs, Pinterest, and other sites can bring you tons of wallpaper inspiration that will help you get started on your project.
Wooden and glass surfaces work great with this kind of project, so look around for pieces in your home or office that might need some new energy.
Gather Materials & Take Measurements
Once you have an idea of what you want to do, it's time to gather your supplies. In order to make sure you have enough paper, you'll want to measure the furniture. The paper should cover the surface and fold under the corners in order to create a seamless look.
You can grab all the supplies you need to decorate a dresser, doors, or wardrobe at your local hardware store. Besides a roll or two of wallpaper with decorative elements, you'll likely need a craft knife, sand paper, soft cloth, plastic squeegee, foam roller or a paint brush, finish, and some paint if you're hoping to do some painting as well.

Prep Your Surface
Whether you're working on the drawer fronts of a dresser, a table top surface, a back panel, or an entire piece of old furniture, you want to make sure that the surface is a bit rough and completely dry.
Start by filling in any old hardware holes and sanding the drawer front or table top until it has a bit of a rough finish. This will help the wallpaper stick to the furniture and look amazing.
Then, give it a wipe down with a damp cloth so that the surface is clean and rid of any dirt. When all the drawers or surfaces are dry, you will be ready to apply the wallpaper.
If you're painting any part of the furniture, you should do that before applying wallpaper to avoid getting paint on the paper.
Apply The Patterned Wallpaper
If you opt for peel and stick wallpaper, the next step is pretty straight forward. Working with smaller pieces of paper for smaller drawers and surfaces, peel the backing and stick the paper where you want it, making sure it has a completely smooth finish and does not have any air bubbles.
To smooth it out, run a craft knife blade, straight edge, or other hardware over the paper until the air bubbles are gone and the edges are firmly stuck to the surface.
If you are using more traditional wallpaper, you will need to cover the top, edges, and corners with wallpaper glue or mod podge.
Then, apply the wall paper all the way down the surface, smoothing it out as you go. You will also need to smooth out the air bubbles with a blade.
Finishing Touches
After you have applied the peel and stick wallpaper or glued down your paper, you're almost done!
To finish the look, trim the edges to make sure there isn't any extra paper hanging off the frame. Once this has been done, you're all set to place the furniture.
The entire room will feel brand new with this DIY! You'll be dreaming of making these personalized and decorative pieces for every room in your home.
Most interior decorators and home improvement professionals will agree that removing old wallpaper is the most viable option to remodel a room instantly, rather than painting over it. Removing wallpaper is not a tough job; it's just time-consuming and back-breaking. The right wallpaper removal tools and techniques can significantly reduce the effort you should exert, even for the most stubborn wallpaper.
Assess Your Wallpaper
Figure out what type of wallpaper you're working on - removable, strippable, waterproof, or vinyl wallpaper – as the time it takes to remove may depend on it.
For example, in some instances, a strippable wallpaper can be easily removed by using a putty knife, and without water or chemicals. And simply peel it away at a corner or under a switch plate. You may go to this link to learn more.
You might often encounter vinyl-coated wallpaper (wallpaper backing), paper with a waterproof top layer, or professionally installed one that won't peel from the wall with a simple tear because of the wallpaper adhesive used. In cases like this, scoring the paper first is necessary before proceeding with the scraping process.
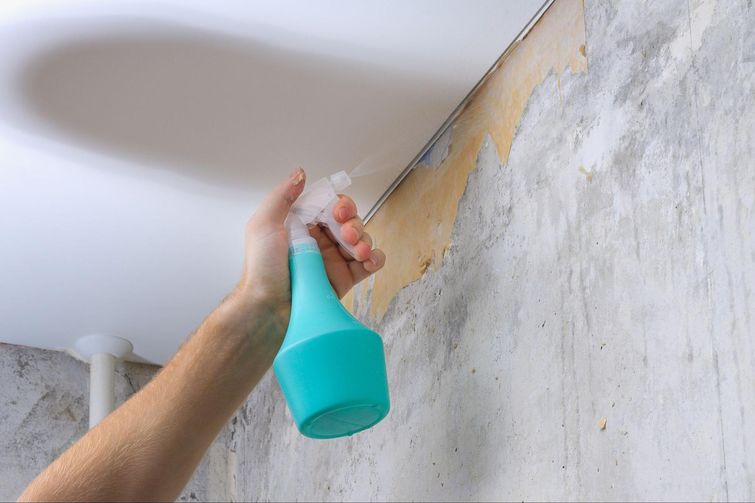
Wallpaper Removal by Scoring
Step 1. Properly Prepped Your Walls And The Room
Some things within the room might get wet and sticky. So, before starting, remove all wall decorations, picture frames, and any furniture blocking your entire wall. Likewise, if you have big lamps extruding in the wall, you'll need to remove those. Unscrew the light switch and electrical outlet covers, and turn off the electricity supply to the room you are working in.
With wide painter's tape, tape plastic along the baseboard. It will prevent shreds of dropped wallpaper from coming into contact with your baseboards, saving the carving from damage and you from needing to take off the paper once more.
Water and detergent solutions can stain floors. Protect your floor with absorbent rags or drop cloth. The tape along the baseboard will also keep water or solvent from dripping onto the floor and chair rails.
Step 2. Dealing With Wallpaper Glue And Waterproof Wallpaper
Scoring means poking tiny holes in the paper so that your solvent can seep beneath to fulfill its function - to reach and soak the paste underneath.
The quickest, most straightforward way to do this needs one handy instrument – a wallpaper scoring tool that you can buy in your home improvement store. This tool's tiny teeth create several cuts into your drywall and plaster walls. It will expedite the time to remove challenging wallpapers, such as wallpaper glue and old or painted-over wallpapers.
However, a fork can also do the trick. Just ensure you utilize a fork that's ok to discard afterward.
How To Use A Scoring Tool?
Hold the wallpaper remover scoring tool against the wall surface. Using light pressure, roll the tool from corner to corner and floor to ceiling in a circular motion, allowing the wallpaper stripper to puncture.
If not used correctly, you might damage the teeth of the instrument and increase the risk of wall damage.
If you're using a fork, run that fork all over the surface of the wallpaper, scraping to produce as many dents as possible to lead the solvent off. The more holes you create, the better the stripper will access. But abstain from working strenuously.
Step 3. Soak With Hot Water And Fabric Softener
Weaken the glue by mixing equal parts of fabric softener and hot water in a spray bottle. The mixture is the key to efficiently removing the paper. You may also use a solution of one part distilled white vinegar with two parts hot water.
Thoroughly saturate one section of the wall, starting at the top left and working your way down. Be sure to wear eye protection. And wait 10 to 15 minutes to penetrate the paper completely. Some walls have several layers of wallpaper, so be patient.
Note: You should work in a section of 4' at most, as this will help guarantee that the wallpaper remover solution does not dry out before you can scrape the paper and paste away. Moreover, drywall has a paper surface and saturating it longer than 15 minutes can cause permanent damage.
Step 4. Scraping the Old Wallpaper
Once the stripping liquid has completed its work and the glue loosens up, you must be able to remove the wallpaper effortlessly with a scraping tool or putty knife. Once it lifts, continue using your fingers to skin the paper from the wall.
Continue spraying the hot fabric softener-and-water solution onto the wall, if necessary, to further soften the stubborn paste underneath it.
Now, You May Remove Wallpaper Easily
Wallpaper removal is a long process yet an easy job. And now that we've explained how to score your wallpaper, you must be optimistic in proceeding with your wallpaper removal project.
Don't Worry! Apex Wallpaper has got you covered whether you need to score or simply scrape your wallpaper.
Regardless of the type of wallpaper project you are embarking on, we will complete the job flawlessly on the first attempt. Call us now if you need help removing wallpaper efficiently, and/or installing a new one. We'll be happy to assist!
Home improvements and makeovers have become quite the trend, especially since the start of the COVID-19 pandemic. Whether it's been painting every room in your house, buying or rearranging furniture, or looking for unique ways to customize your room, making upgrades and changes can be fun and also a good way to spend time with your family.
One thing you may have been looking into is paintable wallpapers. This product is exactly how it sounds: wallpaper that you can actually paint over. Isn't the whole point of wallpaper to avoid painting your walls? Technically, yes. But trust us, paintable wallpaper is fun and a great way to add a unique texture to any room in your home.
What To Use Paintable Wallpaper For
Paintable wallpaper can be used for various reasons:
- Replacing old wallpaper
- New kitchen backsplash
- For furniture
- Accent wall
- On the ceiling
- Applying to an entire room

Installing Paintable Wallpaper Is Easy
This type of wallpaper is installed like traditional wallpaper. Walls should also be prepped as they would before installing traditional wallpaper. This means you'll need to fill in any nail holes, remove any leftover wallpaper glue, and let everything completely dry. Once dry, you'll need to sand and smooth the wall and apply a primer. Let dry again.
Ensuring the walls are completely dry and prepped will make installing paintable wallpaper that much easier. You'll also want to have the following tools on hand:
- Razor knife
- Tape measure or ruler
- Pencil
- Wallpaper smoother
- Paint roller and tray
- Straight edge
- Spray bottle with water
- Sponge
First, you'll need to determine where to start. Draw lines on the wall with a pencil as a guide. You may also find it helpful to draw lines on the back of the wallpaper as a guide too. Next, put the wallpaper adhesive in a painting tray and use a wallpaper roller to roll it on the walls. Don't apply it to the entire wall. Do small sections at a time so it doesn't have time to dry. Start hanging the wallpaper at the top of the wall and work your way down. Use a wallpaper smoother to get rid of any bubbles/imperfections. Use your utility knife to trim any extra paper.
Repeat until you've covered the entire wall or room, whichever look you're going for!
Why You'll Love Using Paintable Wallpaper

People use textured paintable wallpaper to obviously add texture to a room and create a unique space rather than going for a more traditional look. This is why it's also a great option to use as a kitchen backsplash or one accent wall. Plus, there is a variety of different textures, patterns and designs to choose from to suit your preferences and goals.
After installation, you paint over it with your colour or colours of choice and the type of paint of your choice – gloss, semi-gloss, matte, etc. You don't need special paint to use with this type of wallpaper, however, you should let the wallpaper rest for 36-48 hours before painting it.
Can Paintable Wallpaper Be Used In The Bathroom?
While most wallpapers can hold up well in a bathroom regardless of humidity and moisture, it's best to test it out first. Cut a small sample and place it on the wall for about a week or two to see if it's held up well.
Paintable wallpaper makes for a great accent wall in a bathroom or as a sink backsplash.
Contact A Professional For Help
If you don't have time to remove old wallpaper yourself or install paintable wallpaper, contact a professional contractor like Apex Wallpaper. We're a Toronto-based wallpaper installation company that has been in business since 1998. We can efficiently remove old wallpaper, prep your walls, and install paintable wallpaper for you. We can also provide our expert advice on the best type of pattern and paint to choose that will work best for your home and design goals.
We can also discuss other types of wallpaper coverings such as peel and stick wallpaper, vinyl, liner, printed, and more. Whether it's for bathrooms, bedrooms, kitchens, or even ceilings, we'll help you make the right decision so your new wall covering will last for years.
If you own a house with wood panels, a makeover is perhaps necessary to preserve its aesthetics. Typically, homeowners opt for wallpaper when they wish to add texture and pattern to their room. Likewise, for those who do not like the trouble of removing the panels, installing wallpaper over the wood is a great solution. It’s as manageable as painting it!
Follow these procedures on wallpapering over wood paneling for a modern look.
Step-By-Step Instructions On How To Install Wallpaper Over Your Wood Panels
Step 1. Buy Wallpaper That Will Cover It Well
Your local hardware store sells wallpaper that is intended for this goal. The best wallpaper for covering wood panels is the heavy-duty type. It will provide you fewer troubles, particularly if you have shallower paneling grooves and decide not to caulk. While heavy-duty wallpaper will be harder to punch holes, it’s a lot easier to alter if necessary.
Some people also prefer paintable wallpaper. It’s ideal if you wish to add some texture to your wood panels, yet still like full control over the colouring of your room. This type of wallpaper is commonly texturized with a seamless pattern that will truly pop and stand out after you have painted it.
Others choose the self-adhesive type or the peel and stick wallpaper. This type of wallpaper works like a sticker. You can simply peel off the backing and install it on the wall. If you beautify frequently, it's easy to peel and replace!
Step 2. Preliminary Repairs Of The Wood Paneling
Regarding proper wallpapering on wood surfaces, it is important to have your entire wall adequately prepared. The second step will be to clean your wall paneling by removing the grease and dust. For best results, mix hot water with vinegar or unscented dish soap. Also, make some effort to look for mold, particularly around the top and bottom corners. And if you see any, it may be better to dispatch the wood panel, particularly if the panel has moistened from leaks.

But, if it is mold-free, prepare the paneling by sealing gaps with wood filler or drywall mud and caulking visible paneling seams. Carefully remove outlet covers, nails, and other objects from the panels to avoid causing any damage. If some wood is loose, hammer a few nails into the groove where it's hooked.
Sand the surface down with a sander and 120 grit sandpaper. Sanding a surface rids of the top glossy layer, granting the surface to take in the primer.
Step 3. Priming (Sizing) The Wood Paneling
Choosing the right primer for your special renovation is a critical measure in securing a good installation. Applying a quality oil-based primer is a fantastic assurance for you to revel in the durability of your wallpaper. The primer acts by not letting the wallpaper adhesive permeate and absorb into the surface of the wall. It even masks or closes up the wood to stop the paste from bleeding through.
Note: When using a primer, sizing is not necessary, though it’s still great to use sizing over primer anyway as you still achieve the perks of easier installation and removal afterward. Some primers nowadays also work as a sizer.
Paint on two coats of the primer using a paint roller and allow each coat to dry once laid. After the second coat of primer is completely dry, coat walls with one coat of acrylic-emulsion sizing. These efforts will make the walls’ surfaces rougher so that wallpaper sticks more efficiently.
Step 4. Applying Wallpaper Liner
Use a measuring tape to measure the wall's height and length. Trim the pre-pasted liner paper with a utility knife according to the measurements attained.
With clean water, drench the wallpaper liner thoroughly but not dripping. You can soak in a tray or use a spray bottle. Place the strip of wall liner toward the paneling, working from left to right. Smooth it out as you allow more of it to adhere to the wall. Flatten it with a squeegee to eliminate air pockets and wrinkles. Repeat the process until all the panels are covered.

Step 5. Measuring & Cutting Wallpaper To Cover Wood Paneling
After correctly preparing the wood paneling, you can begin wallpapering.
Again, make sure to measure the height of the wall at different sections and mark your wallpaper. To avoid risks, add a few inches to the top and bottom end so you can cover possible discrepancies in the height of the wood paneling when needed. Now you can cut it.
Remember that before trimming the second strip of paper, ensure any patterns on the paper are matched. Spread the wallpaper on the floor to match the design. If you're sure about the layout, cut it. Mark each strip to avoid confusion.
Step 6. Attaching The Wallpaper Over Paneling
A high-quality wallpaper paste helps ensure a smooth, professional look on wood paneling. Use a pasting brush to apply the paste. Then, hang the first strip of wallpaper on the wall from top to bottom.
Use a sponge to wipe off paste residue. It's much easier to wipe off the paste while it’s still wet rather than waiting until it cures.
Smooth the paper to the panel with a roller along the angle where the wood paneling meets the floor and the ceiling, making a crease. Smooth any air bubbles to the edge of the paper to escape. However, don't push down too hard on your smoother otherwise, you'll press out the adhesive and rip the paper. Then, trim the excess paper.
Apply the second strip of wallpaper next to the first one, aligning vertically. Repeat the procedure until your wood panelings are covered. Allow the lining paper to dry for about 24 hours.
That’s it, enjoy the sight of your new walls!
So, Can Wallpaper Stick To Wood?
Yes, of course!
You can hang wallpaper over wood paneling with proper prep, priming, lining, and attaching. And, if you need some help, Apex Wallpaper. is here to simplify the process of applying wallpaper over wood paneling for you.
Contact us today for more information or any questions you may have about your walls makeover project!
Wallpaper border, also known as border paper, was a stylish trend in the 1980s and 1990s; it was used to add style to the entire border of your room.
But, now, wallpaper border has fallen out of style in preference to the painted room, and many homeowners are want to take their rooms into the twenty-first century. The simple solution is to remove their wallpaper borders.
You can remove a wallpaper border in only a few steps. It will take some time and a bit of elbow grease, but you can remove wallpaper border from your room.
How To Remove Wallpaper Borders
We guide you through how to remove wallpaper border using our tried and trusted removal methods. Along the way, we share some expert tips that we have learned from years of work.

What You Will Need:
- Dish soap or liquid fabric softener
- Drop cloth
- Putty knife or wallpaper scraper
- Warm water
- Spray bottle
- Wallpaper scoring tool
- Perforation tool
- Sponge
- Wallpaper steamer (optional)
- Hair dryer (optional)
1. Gather your tools
Before you start removing the wallpaper border, you will need to make sure you have everything ready. Take a look at the list above and gather everything you will need. You can find ost items can either around the house or at your local hardware store. Once you have everything ready, you can begin to prepare the area.
2. Prepare the area
Removing outdated wallpaper border is a messy task. Small sections of paper may be littered around the room as you strip the existing wallpaper off of your walls.
You can minimize the clean-up that you will have to do later by preparing the room before you begin the removal process.

Lay down a plastic sheet or drop cloth on the floor to catch any paper. Remove any furniture that you do not want to be damaged. Cover any remaining furniture with a plastic sheet.
3. Score the wallpaper
If you are worried about your old wallpaper giving you too much trouble, use a wallpaper scoring tool. The perforating tool will poke tiny holes in the wallpaper, making it easier for the wallpaper stripper or another solution to wet and reduce the adhesive.
Expert tip #1: Do not put too much pressure behind the scoring tool, even on stubborn spots. The tool can damage your wall if you press too hard.
4. Locate the seam and lift the corner
Next, use a wallpaper scraper or a putty knife to find the edge (also known as the seam) of the wallpaper. Thankfully, it is relatively easy to find the seam of the wallpaper border because the paper only covers the top border of the walls, not the entire wall surface.
Once you have located the edge of the border, gently push the corner of the plastic scraper under the edge. Pull the corner of the paper away from the wall using the knife. You are ready to peel away the border.
5. Peel away the wallpaper
After you pull back a large section of the wallpaper border with the putty knife, slowly peel the paper away from the water. When peeling the wallpaper, apply even pressure to the putty knife. Even pressure will help ensure that the paper does not tear.
6. Use wallpaper remover or steamer (optional)
If you cannot lift the old wallpaper, the wallpaper adhesive is likely to blame. You can use a steamer, wallpaper stripper, or hair dryer to help loosen the adhesive under any unpeeled section of wallpaper.
Steamer
A wallpaper steamer will make it easier to get your plastic scraper underneath the wallpaper border. The hot water in the steamer will heat and loosen the glue. As a result, the wallpaper will come away from the wall easier.

Hair Dryer
If you do not have a steamer, consider using a hair dryer on high heat. It will do much the same as a steamer; heat the adhesive and make it more pliable and easy to remove.
Stripping Solution
A good alternative to a steamer is a wallpaper remover. You can make your own remover with a spray bottle filled with a mixture of hot water and soap (fabric softener or soap is fine). After you spray the mixture, the hot soapy water will soak into the paper and loosen the glue underneath.
Expert tip #2: If you choose to use the spray bottle method, make sure to mix 1 part hot water and 1 part fabric softener or dish soap.
6. Remove the wallpaper glue
After the wallpaper border has been removed, you will need to remove the glue residue from the wall. We recommend that you spray the warm water and soap solution onto the wall, then use a sponge to rub it in. The warm water and soap will loosen the layer of glue, which you can remove with the sponge.
8. Clean the wall
Most wallpaper borders will leave some sort of dirt, dust or grime behind when removed. It makes sense—the wall underneath the border has not been cleaned for years.
Take the time to clean your walls before you apply a new border or layer of paint.
9. Apply new paint (optional)
When you remove a wallpaper border, you may damage your painted wall. This is expected; wallpaper glue seals the wallpaper border to the wall and will pull on the wall's surface, loosening the paint and taking chips away with it.
Painting may be needed after you remove a wallpaper border.
If the painted wall is not severely damaged, you may be able to get away with adding a new top layer. However, now may be a good time to transform your space.
Installing wallpaper on a ceiling is not as difficult as you may think. All it takes is some patience and attention to detail. You should start by using a tape measure, pencil, straightedge, and hammer to mark the layout of your pattern onto the ceiling. Next, fill in any areas that will be covered with trim such as window sills or door frames with painter's tape before installing any wallpaper up there.
We’ll walk you through a more detailed step by step process.
Steps To Installing Wallpaper On Ceiling
Marking the Layout
The first step is to mark the layout of your wallpaper on the ceiling. You can do this by using a level and a pencil to draw faint lines where you will be placing each strip of wallpaper. This will ensure that your wallpaper looks even when it's finished.
Using A Tape Measure
When hanging wallpaper on a ceiling, it’s important to use a tape measure to get accurate measurements. You will need to know the length of the ceiling in order to cut the paper to the right length. The cut width is typically about an inch less than the height of the ceiling. This will leave a half-inch overlap at each end to allow for proper hanging and smoothing out wrinkles in the paper.
Filling In Areas With Trim

If you have a textured ceiling, it's best to fill in the areas around the wallpaper with trim. This will give your ceiling a more finished look and help to avoid any bumps or lumps in the wallpaper. You can use either wood or plastic trim, depending on what type of finish you want. Just measure the area that needs to be filled and cut the trim to size. Then, using a paint brush or roller, apply a coat of adhesive to the back of the trim and press it into place.
Applying Adhesive
Put some adhesive on a roller and begin at one corner of your wall. Slowly roll out to the other end, applying pressure with each pass. If you feel like there is not enough pressure being applied then add more adhesive or just keep going over it until you can get rid of all bubbles in between paper and ceiling. Some brands recommend letting it sit for 24 hours before hanging wallpaper.
The best way to begin is with a clean ceiling that has been well prepared and primed if needed. You can find rollers made specifically for applying adhesives, but any roller will do the trick so long as you ensure your paper comes off of it easily when completed.
Unrolling The Wallpaper
When preparing to wallpaper the ceiling, it's important to begin by unrolling the paper onto the floor. The roll should be unwrapped completely with no wrinkles in order for you to determine whether or not there are any creases that need ironing out. If they are present, then carefully steam them out using an iron set on low heat, making sure to avoid getting the wallpaper wet.
After the paper is smooth, cut off any excess using a sharp blade or scissors so that it hangs evenly from the ceiling. It's best to start in one corner and work your way across and down; this will help ensure that there are no bubbles or wrinkles.

Smoothing It Out
If you have a smooth surface, such as wallpaper or paint on the ceiling, it will be easier to apply your new wall covering. In spite of this fact, there are still some tricks that can help make installation much smoother and faster as well as keeping any bubbles from popping up out of nowhere! You should always start at one corner and work your way out, making sure the wallpaper is smooth as you apply it.
This may seem like a no-brainer to some people, but if your surface has any bumps or ridges in it, it will be nearly impossible to get a good result.
Trimming The Excess Paper
Once you have the wallpaper positioned how you want it on the ceiling, use a sharp blade to trim away any excess paper. Be careful not to cut yourself in the process! If there are any bubbles or wrinkles in the wallpaper, you can gently push them out with your fingers. Once everything is trimmed and smoothed out, it's time to affix the wallpaper to the ceiling.
Applying The Wallpaper
There are several ways you can affix wallpaper to a ceiling: with paste, water, or adhesive spray. If you're using a paste, mix it according to the manufacturer's instructions and apply it to the back of the wallpaper in a thin layer. Be sure to avoid getting the paste on the front of the wallpaper, as it will be visible once it's up.
If you're using water or adhesive spray, follow the manufacturer's instructions for application. In most cases, you'll need to apply a thin layer to both the back and front of the wallpaper, wait for it to become tacky, and then apply it to the ceiling.
These methods are all valid, but they don't produce exactly the same result with every wallpaper style. If you're using heavy-duty paper or vinyl rather than lightweight material, your method of choice might not work as well.

Cleaning Up Excess Adhesive
Wallpaper may not come off easily from the ceiling. In such cases, you'll need to use an adhesive remover. If there is excess adhesive stuck on your wall, it can be removed with a rubber-backed tool and mineral spirits or another solvent approved for wallpaper removal by the manufacturer of the paper itself. You should test this in a small inconspicuous area before applying it.
Bottom Line
You may have attempted to install wallpaper on your ceiling, but it's likely that you ran into some problems. Fear not! You are not alone in this struggle and the good news is there are ways to get around these difficulties. The methods detailed above should help with any issues related to the installation or cleanup of excess adhesive. If all else fails, contact a professional who can recommend the best approach for your specific situation. When done right, putting up wallpaper on ceilings will be an easy DIY project!
It is no surprise that people are seeking out an affordable, DIY-friendly alternative to traditional wallpaper. Traditional wallpaper is complicated to install. Thankfully, there is an alternative that promises less work and a stunning finish: peel and stick wallpaper.
Convenient Self Adhesive Wallpaper
Despite its easy installation, peel and stick wallpaper still promises a stunning, seamless look. Whether you hang it in your living space or your dining room, it will create a beautiful wall in your home.
How To Install Peel And Stick Wallpaper
Whether you want to create an accent wall or redo your entire space, we can help. Follow our step-by-step instructions to learn how you can install peel and stick wallpaper.

What You'll Need:
- Peel and stick wallpaper
- A straight edge utility knife
- Tape measure
- Pencil>
- Sponge
- Water or cleanser
- Plastic smoother
1. Gather everything you need
Take the time to figure out how much wallpaper you need—it could save you some money and trips to the store. For instance, accent walls require a lot less paper than entire living spaces. So, you probably don't need to buy as much as you would if you were covering your entire living room.
Measure the wall surfaces to determine the area that you need to cover. A simple height x length calculation (minus the area of any windows) will provide you with exactly what you need.
2. Prepare your walls
Next, remove all covers to the electrical outlets. Place the screws and outlet covers in a ziplock bag for safekeeping. Then, prepare the wall surface by applying a cleanser with a sponge. You should allow the wall to dry before moving on to the next step.
3. Draw a guide to help you hang it perfectly straight
From the left side of the wall to the right side, use your tape measure to create marks that match the width of your wallpaper along the wall. After, draw a vertical line at each mark. The straight line will be a guide to where the edge of the wallpaper should sit.

4. Cut full strips of peel/stick wallpaper
Measure and cut the first strip of your wallpaper. The strip should be the entire length of the wall to ensure you do not break up its pattern.
5. Hang peel and stick wallpaper and smooth out air bubbles
It’s now time to install the wallpaper!
First, line up the top of the paper at the top corner of the ceiling, then simply peel the backing off to reveal the adhesive. As you peel, evenly press the entire piece down the wall. The strip will fully cure the wall. Next, use a smoothing tool to press the paper onto the wall and smooth out any air bubbles. Make sure not to press too firmly because you may rip the paper.
Use the same technique to apply the other strips.
6. Cut and fix removable wallpaper as needed
If you are working around a window or cabinet, trim the excess material to make it fit. If you notice that the pattern isn't lining up, you can pull the strip off the wall lightly and reapply it.
Is your kitchen feeling bland and boring? You can elevate your kitchen by installing a kitchen backsplash with removable wallpaper. While it is not a tempered glass backsplash, hanging wallpaper backsplash is a great way to add some personality and style to your kitchen—especially if you are in a rental house. It’s also a relatively easy project that you can do yourself. Follow our step-by-step instructions to learn how to complete this DIY project.
Supplies Needed
- Measuring tape
- Utility knife
- Board
- Cutting mat
- Peel and stick wallpaper
How To Install A Kitchen Backsplash With Peel and Stick Wallpaper

Follow these steps to decorate your kitchen with a peel and stick backsplash. It's a simple project that can transform the appearance of your dining area!
1. Prepare the area
Before you start wallpapering, prepare the area by wiping it clean with a rag and some soap. Let the wall dry before moving on to the next step.
After it has been wiped clean, remove any outlet covers around light switches. It is also a great idea to remove items on your countertops for ease of installation.
2. Figure out your backsplash space and size
Next, you need to learn how much space you have to cover and wallpaper you need. Measure the area where you want to install the wallpaper. You will need to navigate around upper cabinets and trim to get an accurate measurement.
3. Cut the wallpaper sheet to create a tile
Cut the wallpaper to fit. Make sure to leave a few extra inches on each side and at the top and bottom, just to be sure that you don’t end up without enough wallpaper. You can cut this off later.
4. Smooth out the paper
Most peel and stick wallpapers come in rolls that can cause the vinyl to warp. Lay the wallpaper on a flat surface and use a board to smooth it out. Spread it out on your countertop if you have ample counter space.

5. Apply wallpaper
Peel the paper off the back of the wallpaper tile only at the top corner. Line the top of the wallpaper up at the very top of your backsplash area and press it gently to the wall's surface. Slowly pull the rest of the backing off the paper to adhere it to the wall. Make sure it is thoroughly stuck before continuing.
Repeat the process with other sheets while being careful to line up the pattern. If the pattern does not line up, remove the paper and reapply it.
Note: Peel and stick vinyl wallpaper may remove paint or drywall when it is removed from textured walls.
6. Enjoy your kitchen's new look
Now that you've installed your new wallpaper design, you can enjoy the brand new appearance of your kitchen. The pattern and colours can add an exciting flair to your decor.
Meanwhile, you do not have to worry about your wallpaper while cooking; the material can easily be cleaned if something splatters from the stove or sink.
Wallpaper is a classic favourite among the design-savvy. Many people enjoy how wallpaper adds texture, design, and style to any room. Wallpaper is also incredibly versatile; it can be installed on any wall surface (and even your ceiling!). These benefits have caused wallpapers to, once again, become a popular choice for interior design. Yet, few people know what types of wallpaper are available to them.
Our wallpaper experts will give you a brief rundown on the different types of wallpaper. This will help you narrow down the best wallpaper types for your interior design project.
1. Paper Wallpaper
Paper wallpaper is made out of … yes, you guessed it: paper. There may be a top coating to seal the paper, but this is not always necessary.
Paper is a popular choice for photo wallpapers, a type of wallpaper that features one solid picture. The paper allows the image to be easily printed and cut, then reassembled into one large mural.
2. Paper-Backed Vinyl Wallpaper
Paper-backed vinyl is made of vinyl and paper. This type of wallpaper is made by applying a thin layer of vinyl over top of the paper. The vinyl provides durability—something that paper wallpapers do not have.
3. Solid Vinyl Wallpaper
Vinyl is one of the most widely used wallpaper materials—and for good reason. Solid vinyl wallpaper is the most durable type of wallpaper available. Its material and thickness make it easy to install and remove. It’s also moisture resistant, making it the perfect option for people looking to install wallpaper in their bathroom, kitchen, or laundry room.
You do not have to sacrifice style for durability—vinyl can be vibrant and include intricate designs. You can enjoy having beautiful and durable wallpaper in your home.

4. Flock Wallpaper
Flock wallpaper is composed of tiny fibers attached to an adhesive surface. The end result is a unique, textile wallpaper with a velvet feel. This type of wallpaper is perfect for anyone who wants to add a bit of retro fun to their space.
Note: Since flock wallpapers are made out of fabric, it is best to use them in areas with little moisture.
5. Fabric Wallpaper
Fabric wallpapers, also known as textile wallpapers, are interesting wall coverings. Rather than being made out of paper, they are composed almost entirely of fabric. The only part of this wallpaper that is paper is the back, the spot that the adhesive will be applied.
6. Non-Woven Wallpaper
Non-woven wallpapers are made out of a blend of natural and artificial fibres, creating a beautiful and natural appearance. The combination of materials also allows them to be both breathable and washable. So, if you ever have any spillage, you can easily wash off the wallpaper's surface.
You will have to pay more for both style and functionality; non-woven wallpapers are more expensive than other wall coverings, but they are a worthwhile investment.
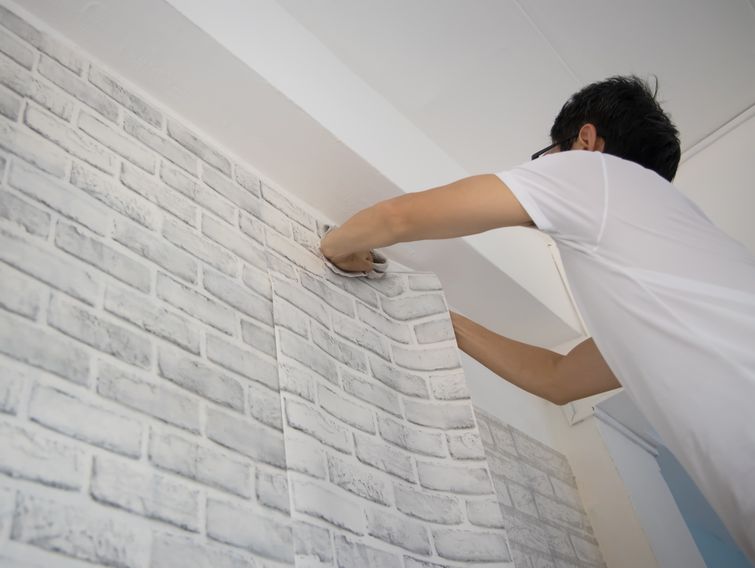
7. Prepasted Wallpaper
Prepasted wallpaper can be made out of any type of wallpaper material—the only difference is that it can be easily pasted on the wall.
If you don’t want to go through the tiresome installation process, you can purchase prepasted wallpaper. All you need to do is wet the paper backing to activate the liquid wallpaper adhesive, then stick it to the wall. The adhesive will grab onto the wall, holding the wallpaper in place.
8. Anaglypta or Embossed Wallpaper
Have you always wanted a textured wall in your dining room? Applying a layer of stucco may seem like a big commitment. Instead of completely changing the surface of your wall, install textured wallpaper!
Anaglypta wallpaper is a type of duplex paper. It is heavily embossed, meaning that it is thick and raised. Most anaglypta wallpaper has intricate patterns that only stucco could achieve. The best thing about anaglypta is that it is paintable wallpaper; you can easily paint over it to change its colour.
9. Grass Cloth Wallpaper
As more people become aware of their environmental footprint, more are choosing environmentally-friendly products made from all-natural materials. If you are one of the many people looking to choose environmentally-friendly products for your home, we recommend grass cloth.
Grasscloth is a lighter colour wallpaper that is made entirely out of natural materials, allowing you to enjoy the design of wallpapers without any of the waste. The only downside to grass cloth is that it is difficult to clean. Any stains should be spot treated and dirt should be removed with a vacuum cleaner brush.

10. Metallic Wallpaper
Metallic or foil wallpaper is a bright and shining addition to your home. This type of wallpaper features polished, powdered metal and a paper, fiberglass or fabric backing. When it is hung, the metal foil will cause your entire wall to sparkle and shine.
Find The Right Wallpaper For Your Space
There are many different types of wallpaper to choose from. Whether you are looking to decorate your child's bedroom or your living space, you will have many options available to you. We recommend that you consider both the wallpaper design and traits when shopping for wallpaper. While style is a big decision when looking for wallpapers, so is its durability and moisture resistance.
[maxbutton id="1" url="https://apexwallpaper.ca/contact/" text="Contact Us Now" ]