Redesigning a room in your home with some wallpaper can be a great way to add some life to your home. However, trying to to know how to trim and cut wallpaper can sometimes be tricky when you're trying to get it done right. That, along with nooks, tight corners, window frames, outlets, and other obstacles can make trimming wallpaper a bit tricky.
What You'll Need
Here are a few things that you may need:
- Wallpaper
- Stepladder
- Measuring tape
- Worktable
- Pencil
- Scissors
- Newspaper or drop cloth
- Wallpaper paste or adhesive (if the wallpaper is not pre-pasted)
- Long level
- Wallpaper brush
- Straightedge (putty knife will do)
- Utility knife blade
- Sponge
- Lukewarm water
- Seam roller
STEP 1: Prepping
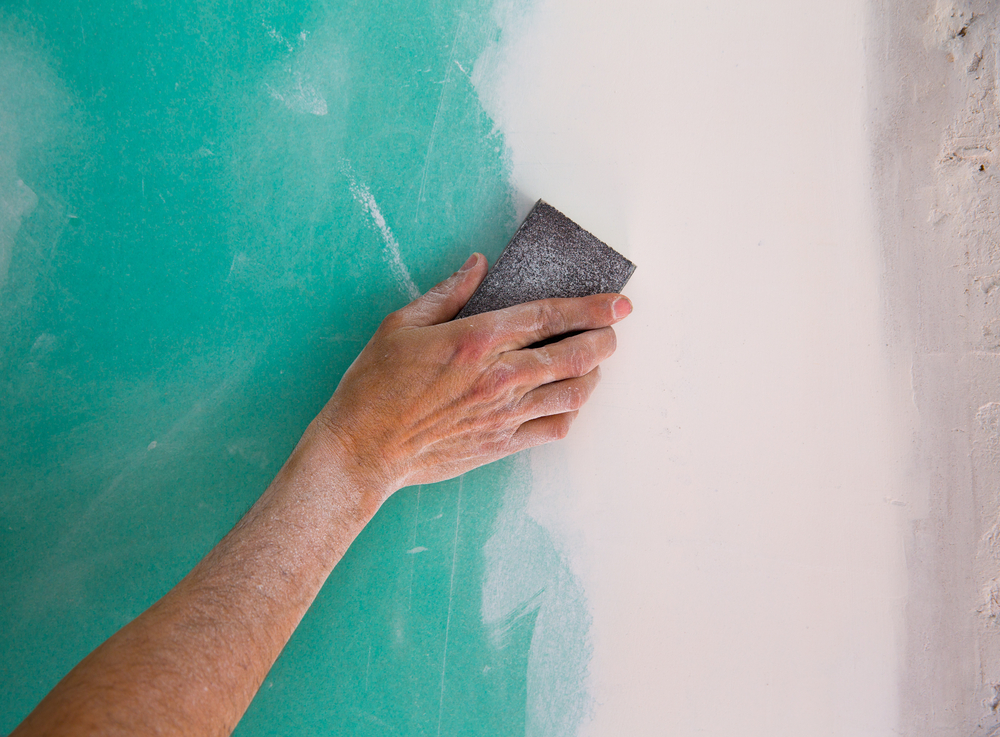
The first step in any DIY home project is to prepare the area. In this case, you have to prepare the wall surface by wiping down the walls with a sponge and bucket of warm water. You will want to wash the entire surface before you hang the paper. After the walls have dried thoroughly, sand away imperfections and fill in uneven areas with drywall paste using a large putty knife. Let dry for 24 hours, then sand away the excess paste and wipe away any remaining dust from the walls.
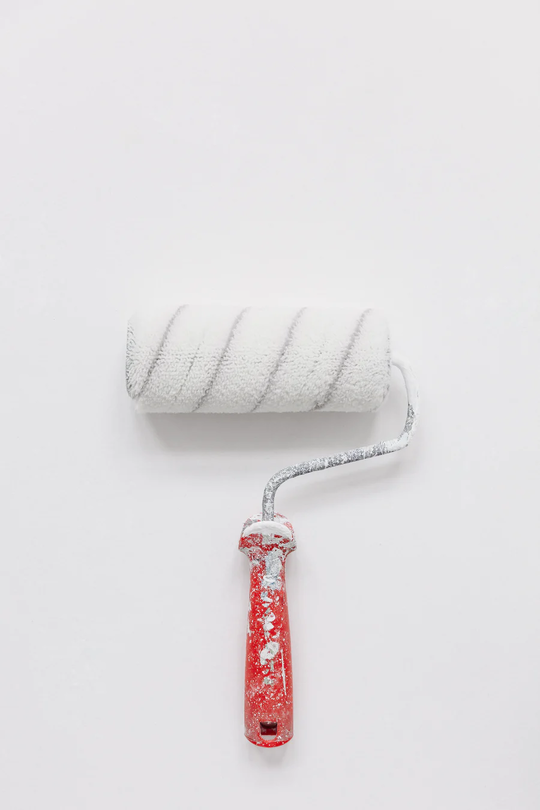
Next, you can apply primer with either a brush or roller to the walls to help the wallpaper stick. Be sure to let the primer dry for at least two hours before hanging the wallpaper. To prepare the unpasted wallpaper, use your measuring tape to measure the height of the wall you are going to paper. Read the manufacturer's instructions on the wallpaper label for the dimensions. As a rule of thumb, add about 5 cm to the top and bottom of the wall height so you can deal with potential differences in the height of the wall if necessary. Then, once you have your wall size, you can cut your wallpaper roll into strips with a razor knife or a taping knife.
STEP 2: Hanging
The next step in the process is to hang the actual wallpaper. For the first strip, you will want to start with a plumb line. This pencil line is your guide to hanging the other panels of wallpaper. To make your plumb line, leave a pencil mark on the wall using a level. Then, you can hang the first panel of paper in the room, aligning one edge with the line. You should use multiple plumb lines throughout the room so that your paper job has a professional look.
Roll out the paper and then apply the paste to the paper with a paint roller. Don't dunk! Roll the adhesive on with the paper backing facing out and then be sure to wipe the wet wallpaper to remove any excess solution. Be sure to not let the water soak into the drywall or it may cause damage. Press the seam between pieces firmly with a seam roller, but be sure to not apply too much pressure. Use a damp sponge to clean any paste residue that squeezes out. Also be sure to use some sort of straight edge to get rid of any air bubbles in each strip, pressing firmly against the ceiling line.
When starting with an inside corner, allow some overlap with the paper on the adjacent wall in order to hang it plumb so that the paper pattern lines up. This is called a wrap and overlap seam where one drop is overlapped with the next drop on your room's inside corners. Cut a dry strip of the first length with an extra 1/8th inch and hang the freshly cut side of the paper into the corner. You can then align the next strip from the outside corners of the next wall so that it overlaps and the pattern on the paper matches up.
STEP 3: Trimming
Once you are satisfied with the papering and you are certain it is safe to trim the wallpaper, you can begin to trim away the excess wallpaper with scissors. For strips that meet the trim edges or the ceiling, make a relief cut to get rid of most of the excess. Relief cuts can save you time as you hang the wallpaper before continuing with trimming away extra length and excess paper.
You can also use diagonal cuts to get clean lines around different edges like a window or outlet. For electrical outlets, find the outermost corner of the outlet cover with your finger, then make a diagonal cut straight across the wall socket from one corner to the other. Do the same on the other side to make a cross. Then you can peel back the four points and use a leading edge and blade to trim the paper around the socket. This same practice can be applied to a window frame and window trim. Once you're finished, let the wallpaper dry and then you are free to enjoy your newly papered interior walls!
Simple, monochromatic walls can give your house a minimalist appearance, which can be a pleasing design decision. However, if you want more colour or bright designs, wallpaper is a great option and can drastically change the way a room looks.
A less expensive option than traditional wallpaper is peel-and stick-wallpaper, which may be applied to walls without the use of obtrusive paste. Instead, this item has a backing made of glue that requires little to no force to cling to walls.
Be aware that peel-and-stick wallpaper often sticks best to smooth, eggshell, satin, or semi-gloss finished walls. To make sure the product will adhere to the sort of walls you have, check the manufacturer's instructions for the wallpaper.
Carefully measure the area you intend to cover to ensure you buy the right amount of peel-and-stick wallpaper. Purchase a little bit of extra peel-and-stick wallpaper than you need in order to account for mistakes and challenging spaces like windows, doors, or little nooks.
Keep reading for step-by-step instructions on how to apply peel-and-stick wallpaper, as well as some general tips and tricks on how to get it just right.
First, Prepare The Walls
Make sure the wall has been adequately prepared before you begin hanging the peel-and-stick wallpaper. Before cutting the wallpaper to fit around the area you wish to cover, start by removing the outer plates from any outlets or light switches.
Make sure to turn off the power before removing the outer plates from any outlets or light switches. The surface of the wall should next be cleaned by wiping it down with a mild, non-abrasive cleanser with a damp sponge or towel.
Newly painted surfaces must cure for at least four weeks before applying peel-and-stick wallpaper. Check the peel-and-stick wallpaper manufacturer's directions to ensure that you are preparing the wall properly for adhesion.
Second, Make A Guide For Your First Strip With A Straight Edge

Making a template for the first strip of wallpaper is one of the most crucial phases in the application process. This will act as a guide to make sure every other wallpaper strip is lined up correctly. You can begin in the middle of a wall or at the corner, but the guide must be perfectly straight.
Take an accurate measurement of the peel-and-stick wallpaper's width, and then pencil that measurement onto the wall. Draw a line in accordance with your marks from the ceiling to the baseboard (or the region you're covering) using a straight edge and a level.
Remember that if you began your measurement in the middle of the wall, it could be helpful to draw a second guideline to show where you began. This will make it easier to guarantee that the removable wallpaper is absolutely straight when it is applied.
Third, Apply Peel-And-Stick Wallpaper

Starting at the highest place where you'll be wallpapering, peel off roughly 30 cm of the adhesive backing and align the wallpaper with your lines. Peel off the remaining backing while pressing and smoothing the wallpaper against the wall from top to bottom. To get rid of air bubbles, smooth the wall using a plastic smoothing tool. Use your straight-edge utility knife to gently cut along the baseboard and remove any extra after the entire piece has been glued to the wall.
Fourth, Repeat After Matching Patterns

To achieve a seamless appearance, align the pattern of the wallpaper while adding subsequent pieces. In order to have the seam lay as flatly as possible, slightly overlap the second piece with the first. Repeat to cover the entire surface, trimming the bottom as necessary.
Fifth, Work Around Windows and Outlets

Allow the wallpaper to overlap any window or door frames or electrical outlets that you come across. Once the piece is in place, trim the excess using a utility knife and a straightedge. Next, smooth the paper against the wall all the way around the window or outlet. Make sure all electrical outlets and switch plates are still off, then use a utility knife to carefully cut away the paper covering the aperture. The outlet cover or switch plate will cover up the majority of flaws, so don't worry if the hole has rough edges surrounding it.
Sixth, Check For Air Bubbles
Use the point of your utility knife or a pin to make a tiny hole in the centre of any remaining air bubbles. After that, smooth the wallpaper by pressing down to let out the trapped air.
When designing a wall space, various elements and tools help you add colour, texture, pattern, and depth to a room. And wallpapers are an ideal way to provide the space with that unique touch that it lacks. Here are some suggestions and expert tips for choosing the right wallpaper for your living room.
Which Wall Should I Wallpaper?
Where you want to apply the wallpaper is crucial since it will need good planning and selection. Wallpaper can be installed to divide or accentuate wall space separated by built-ins.
Entire Room
Applying wallpaper on the entire room suggests that the tone or pattern can become extreme, so you need a more subtle pattern and coloring when wallpapering all four walls.
Accent Wall
Some living rooms already have a focal point like a fireplace mantle, a big window with a view, or large artwork. The wallpaper should only optimize that room and not become an overpowering addition. In such a case, you can wallpaper a single accent or feature wall and paint the rest that will complement the décor and style of the room.
Regardless of your decision, always consider other areas of the room that could also reap the benefits of the application, including ceilings, doors, or fireplace faces.
Wallpaper Ideas For a Living Room
Selecting the right wallpaper design is not a simple task. Because there are different types of wallpaper for every room, choosing the one whose design best suits your living room is vital. Several factors to consider for your living room wallpaper are color, style, textures, and pattern.
Material Of Wallpaper
Depending on the wallpaper's materials, you can create various impressions and compositions. The primary materials from which wallpaper is made are:
- Non-woven wallpapers - easy to hang and easy to remove
- Vinyl (i.e., paper-backed, PVC, or solid vinyl wallpapers) - most commonly used because of its high durability
- Traditional wallpaper - just made of paper and always needs glue
More delicate materials must be utilized for rooms that won't encounter too much damage and are not in high-traffic areas.
Pick Your Colour
Colour sets the mood in a room. Choose a color according to the room's scheme, or highlight the wall in a contrasting shade.
To make a room look bigger and wider, choose wallpapers with a lighter, pastel shade. Light colors invoke coolness, while dark colors are dramatic, making the walls recede. Warm colors like red, yellow, and orange create a lively and uplifting ambiance in your living space. If you usually entertain, try out vibrant and exciting shades rather than cool hues like blue and green that generate a serene feeling in a room.
Opt for colors from the color palette of the rest of your décor. Furniture with dark finishes, like mahogany, stands out against light colors. And dark or intense shades bring out the lightness of wood furniture.
Maximize The Lighting
If the room receives a good amount of natural light, go for wallpaper with a light or neutral color pattern. In a space that is not as well-lit, a shiny metallic wallpaper will make a space feel brighter, reflecting light for a dazzling and gleaming effect. Furthermore, consider patterns with smooth surfaces, which reflect almost all light.
Complement The Style You Want
Stick to a concept and style when choosing wallpaper. Consider a wallpaper style that matches and mimics the living room's design aesthetic.
- Formal = damasks, large-scale patterns
- Glam = embossed, flocked, crystal, reflective, or glittery patterns
- Casual = plant, floral or textured print
- Country = plaid, gingham, or country motif
- Rustic = textured, plaid, wildlife pattern
- Victorian = floral damasks
- Contemporary/Modern = geometric, abstract design
- Romantic = damasks, florals

Check Out Textured Wallpaper
Textured wallpaper provides a range of design purposes. Wallpapers with texture can hide flaws or imperfections, or architectural deformities. They also add an extra dimension, textural interest, and character, and warm the space.
Play With Wallpaper Patterns
A plain wallpaper presents a subtle visual break for a densely decorated space. Patterned wallpapers can have tactile surfaces and mirror a material's look, including wood, fabric, leather, and marble. However, they can be effective only if you pick suitable patterns.
A large-patterned wallpaper appears more dramatic and makes a small room feel more relaxing. You may apply a small patterned paper in a space with many windows, doors, and wall hangings, as smaller-scale patterns create a feeling of spaciousness. Large prints look best in a larger room, while small-scale patterns work well for smaller rooms.
Repeated patterns are another incredible illusion of making a space appear bigger than it really is.
Stripes can also do wonders. Vertical stripes can deliver the optical illusion of a higher ceiling. Similarly, horizontal stripes can make a room feel more expansive. Whatever your choice is, a lovely striped wallpaper is excellent for an accent wall.
Looking For The Right Wallpaper For Your Living Room?
When you follow our tips, choosing a beautiful wallpaper for your rooms is a breeze. Transform a simple living room, dining room, or hallway into an eye-catching space with the proper wallpaper application and with the help of professional Wallpaper Installation Toronto.
APEX is ready to assist you with that beautiful wallpaper that matches your taste and budget! Call us at 416.833.1662 and let wallpaper restore vitality to your living space.
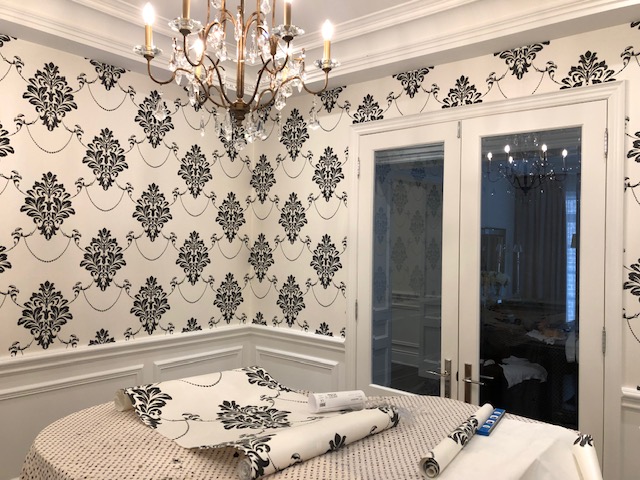
Commercial Wallpapering has been the ideal wall-treatment option chosen for offices, hotels, hospitals, conference rooms, large hallways, assisted living facilities, and almost any high-traffic place where durability and ease of renovation are vital.
Commercial Wallpaper is a large sheet of fabric-backed vinyl intended for public areas and other commercial settings. They are designed to use inappropriately developed and maintained establishments to reduce condensation and prevent moisture infiltration and accumulation at wall recesses and surfaces, especially in warm, humid climates. This wallpaper stands out as a durable, lifelong wall covering needing minimal maintenance.
Hanging commercial wallpaper takes some care and patience, though it does not need to be complicated. If you follow this guide, your job will be done in the blink of an eye.
Step-By-Step Process on Hanging A Commercial Wallpaper
Step 1
Start by removing electric wall plates, heat registers, and light fixtures. Make sure there is no furniture blocking the wall. Cover the entire floor surface in the room where you will be wallpapering with protective plastic sheeting or a drop cloth. You must also cover any objects attached to the wall to keep them clean.
Step 2
Clean the walls thoroughly. The wall surface must be flawless, leveled, dry, and free of mould, grease, or stains. Seal any holes with spackle using a putty knife and ensure it dries completely before proceeding. Scrape the walls with a drywall knife or sand them with 50-grit sandpaper to clear smaller defects.
Step 3
Measure the wall's height and width, then cut the length of the wallpaper with an additional 4 inches longer than the wall. The best approach is to cut and hang one strip at a time to ensure the pattern is a perfect match and prevent needless paper waste.
Step 4
Sizing is a fast-drying primer made mainly for wallpaper. Even with a reliable primer-sealer, using wall size changes the quality of your walls to make wallpaper installation easier and lower the possibility that the paper will shrink. If time permits, allow the sizing to dry overnight, though it is okay to move on and apply your paper after the wall feels dry enough.
Step 5
Make sure all the rolls are not defective or damaged. Apply an even layer of paste with a 1/2" nap paint roller. Make sure to coat every inch of the wallpaper, that includes the sides and the corners.
Book the wallpaper sheet by folding each end inward to the midpoint, allowing the paper to relax before applying.
Step 6
After a couple of minutes, unfold the first strip, and pick it up gently. Because of its width and weight, you may require an assistant to hang commercial wallpaper. We suggest applying the wallpaper from left to right. Apply your strip to the top of the wall, then gently smooth it down the wall with your hand or with a paper hanging brush, starting in the middle and advancing toward the edges to eliminate air pockets and wrinkles. When it's not going down perfectly, gently peel it off, then apply it again. Continue until you have spread the whole strip of wallpaper.
Trim the tops and the bottoms of each wallpaper using a utility knife.

Step 7
When applying the second panel, matching the pattern to the previous sheet is the biggest concern. Repeat step 5, then bring the strip up to the wall, abutting it to the first panel as firmly as possible without overlapping. Once done, gently press your paper, shoving away from the matched edge with a cloth.
Every room will have corners unless it’s round. Measure the first panel's width so it reaches the corner crease and wraps over it by one inch. Hang the second panel by applying the left edge directly into the corner crease, overlapping the extra one inch. Roll seams with a seam roller to secure adhesion. If you find a loose seam in an overlapped wallcovering, use a vinyl-to-vinyl glue to reaffix it.
Step 7
Wipe the whole surface of the wallpaper with a damp sponge to remove excess adhesive.
Step 8
Repeat the process until the entire wall or room is covered. For obstacles like doorways and windows, cut where the wallpaper meets the top of the frame and lay flat the wallpaper against the wall. Then, trim any excess overlap.
Using a knife, score an X over each socket or switch, to make four triangular flaps. Gently crease the edges of your paper, and then cut the flaps against those creases. Now, sit back and enjoy the new view!
Apex Wallpaper For Commercial Wallpaper Installation
Want to hang new commercial wallpaper in your building's lobbies or common areas? We’ve got you covered. Our experts can work with you to develop solutions that suit your room and your establishment's necessities. You can count on Apex Wallpaper for outstanding results from our specialized personnel and highly qualified wallpaper installers.
Call us at 416.833.1662 for more information. We offer competitive pricing and superior quality for every wallpaper installation in the Toronto area.
Wallpaper removal and installation may seem like an easy task, but in reality, it can take a lot of expertise to get the job done right. Along with that comes a whole selection of different tools and equipment that make the job possible—no, just having wallpaper isn't enough. With the right tools, a skilled wallpaper installer can make easy work of any wallpaper job.
If you're thinking about wallpapering part of your home or are wondering why it may be worth it to hire an expert, it can help to know a bit about these tools and what they do. You might just be surprised at the many different tools needed for a quality wallpaper installation!
Essential Wallpaper Tools
Paste Brush
If you aren't using pre-pasted wallpaper, you are going to need some way to apply the paste before hanging wallpaper. While any brush you have lying around may do the trick, it is best to use a brush specifically designed for the task at hand. The reason is that the construction of a paste brush makes them ideal for getting the job done efficiently, and without damaging your wallpaper.

Seam Roller
A seam roller is used to apply pressure along the seams of your wallpaper after you install it. Seams are an area that can easily stand out after you hang wallpaper, and if you don't flatten them properly they may start to peel. Using a seam roller can make these seams invisible, and help to make your wallpaper last for many more years.
Smoothing Tool
There's nothing worse than hanging a sheet of wallpaper only to find unsightly ripples and air bubbles. Luckily, a lot of these issues can be fixed with a smoothing tool or smoothing brush. These tools allow you to efficiently smooth wallpaper, reach those tough corners and edges, and avoid damage.

Level
A level may be a simple tool yet it is infinitely useful. Hanging your wallpaper straight is one of the most important parts of the job, and most of the time your eyes simply can't do the trick, no matter how accurate you think they may be.

Plumb Line
Another useful tool is a plumb line, which is essentially a string with a weight on one end. When hung from the ceiling, gravity pulls the line straight downwards, allowing for perfect vertical alignment.
Chalk Line
A chalk line works a bit like a plumb line but can be used in multiple directions and leaves behind a visible mark on the wall. Essentially, a chalk line uses a string coated in chalk dust to draw a line on the wall between any two points.
Tape Measure
A tape measure will come in handy for multiple different tasks when wallpapering. Most importantly it helps you to measure your room so you know how much wallpaper you need, and it will also help you to measure the length of wallpaper when installing.

Utility Knife
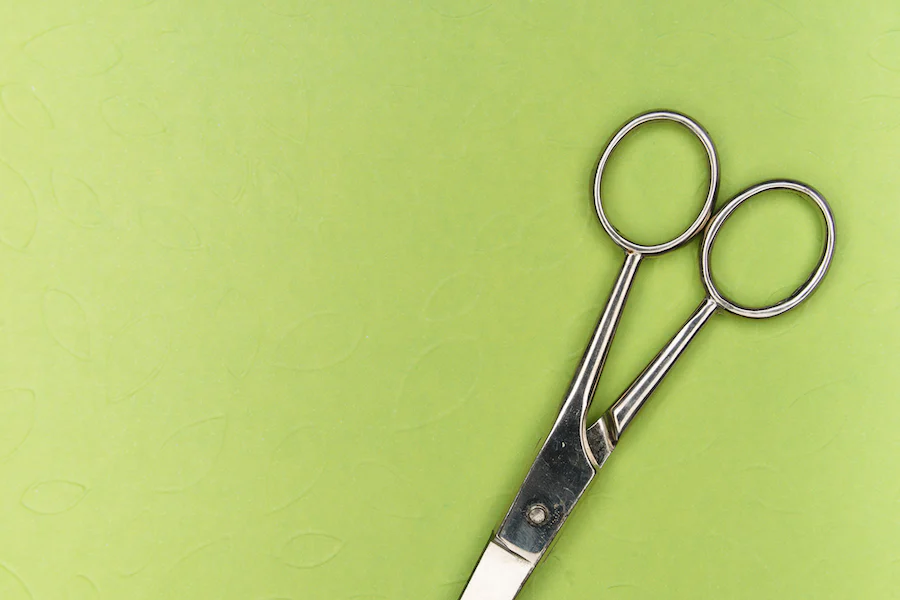
Rarely will your wallpaper sheets be the perfect size for your wall, and you will usually need to trim them down, especially on the floor and ceiling. One of the best tools for this job is a utility knife. These knives can make quick work of cutting and, unlike scissors, they provide a lot more flexibility for those hard-to-reach angles.
Consider a knife with a snap-off blade. These allow you to always make sure your knife is as sharp as possible, so you won't do any unnecessary damage to your wallpaper as a result of dull tools. Along with your utility knife, a straight edge may be useful to ensure your cuts are under control. Remember - you can't undo a cut once it has been made.
Putty Knife
A putty knife is one of the most versatile wallpaper tools. One primary use is as a wallpaper remover, for scraping and removing wallpaper. It may also be used in a pinch as a smoother or straight edge. Finally, it can be used as intended, to fill holes or dents in the drywall before you install your new wallpaper.

Ladders
The walls in a home are on average around nine feet, and often higher. Even for the taller among us, it can be hard to reach those high ceilings to properly install wallpaper. A ladder will be an essential tool to make sure your wallpaper is installed correctly from floor to ceiling. It's important as well that you have a proper ladder, and not try to use other things like furniture to boost your height, as this can pose a major safety risk.
Wallpaper Removal Tools
You may need to strip old wallpaper before you install a new layer. This can be a tough process if you just start ripping and tearing, but with the right tools, it can be made easy. One of the most common ways is to wet the old wallpaper with warm water from a spray bottle or sponge to loosen the adhesive. A wallpaper scorer can help water soak in by making small holes in the paper, and a steamer may help to loosen adhesive as well. Finally, a scraper tool can be used for those spots that don't peel easily.
Conclusion
Overall, installing wallpaper can take a lot more tools than you may expect. Though the right tools can make the job easier, many homeowners prefer to work with a professional wallpapering service to make sure the job is done right.
If you need wallpaper installation in Toronto, look no further than Apex Inc. Since 1998, Apex has provided customers with high-quality wallpapering services that transform your home one wall at a time.
If you're planning to have contemporary, stunning walls at home, putting up wallpaper in your room or on just an accent wall is an excellent alternative to painting. Wallpaper is a unique element to living rooms, bedrooms, and other rooms, and a powerful statement of your taste. If you're searching for a wallpaper installation cost guide, you're on the right page.
Average Cost To Install Wallpaper
Hanging wallpaper costs around $310 to $775, or roughly $527 on average. The labor cost to install wallpaper ranges from $1 to $7 per square foot. The expense can be more excessive if the wallpaper specialists must do some surface repair on your wall. Also, the type of wallpaper you pick, your walls’ sizes, and if you have to remove old wallpaper are the leading factors in calculating the total cost.
Hanging Wallpaper Cost Per Square Foot
You'll pay anywhere from $1 to $7 per square foot to hang wallpaper. The customized paper starts at approximately $5 per square foot and can increase to $100+ if you ask for a fancy design. You often purchase wallpaper by the roll, not by the square foot.
Hanging Wallpaper Cost Per Roll
On average, it costs $25 to $35 to hang a good, ordinary single roll of wallpaper. A typical roll is 28-30 square feet.
But wallpaper is also produced in double rolls, which are between 56 and 60 square feet. In this case, you can expect to spend $30-50 in labor costs on a simple double roll.
More intricate designs and higher quality paper will be more expensive.

Factors Affecting Installation Wallpaper Costs
Type Of Wallpaper
The material is one of the factors that can influence the installation expense. Each material has a different price, offering a distinct look and approach to the room.
Generally, average-priced wallpapers will run between $20 and $50 per roll, though these vary depending on the material, type, and brand. If you’re wondering about specific wallpaper prices, look at the approximate costs below.
Wallpaper Material Cost:
| Material | Per Roll | Per Square Foot |
| Vinyl Wallpaper | $60 – 80 | $1.76 – 2.33 |
| Vinyl-Coated Wallpaper | $58 – 78 | $1.67 – 2.23 |
| Vinyl-Coated Fabric Wallpaper | $90 – 105 | $2.50 – 3 |
| Grasscloth Wallpaper | $80 – 125 | $2.90 – 4.50 |
| Foil Wallpaper | $75 – 95 | $2.14 – 2.71 |
Wallpaper Type Cost:
| Type of Wallpaper | Per Single Roll |
| Peel and Stick Wallpaper | $20 – 45 |
| Pre-Pasted Wallpaper | $20 – 80 |
| Printed Wallpaper | $30 – 50 |
Wallpaper Brand Cost:
- Gracie Wallpaper Cost - These are hand-painted wallpapers and run about $175 per roll.
- Thibaut Wallpaper Cost - Thibaut is famous for pattern, vinyl, and performance models in different colours and prints, and costs around $35 to $90 per roll
- Phillip Jeffries Wallpaper Cost - Phillip Jeffries specializes in natural materials such as raffias and grasses and runs about $25 to $150 per roll.
Dimension Of The Wall
Another factor that you must take into account is the size of the wall. The wall measurements decide how many rolls are needed and the time it takes to put up. It will help with the cost estimate of the overall project.
A roll is typically enough to cover 30 square feet. The larger the wall, the more paper you need; hence, the higher the installation cost.
However, installing wallpaper in rooms with many windows, doors, cabinets, and built-in closets will be more difficult, and therefore more expensive.
Wall Condition
The condition of your walls is also a significant factor. If an existing wallpaper has to be removed or your walls have a rough texture, you must buff that before installing new wallpaper. How much wallpaper must be removed and how demanding the task is will add to the total expense of wallpaper installation.
If you wish to reduce the wallpapering project cost, you can prep your damaged walls, including filling or fixing any cracks, and cleaning and scrubbing them before the paper installation.
DIY Installation Vs Professional Installation

Going for the DIY method is the obvious choice if you need to cut expenditures. But a sizeable wallpapering project might be more satisfactory if fulfilled by professional wallpaper hangers, mainly if you don't possess all the tools required to do the task properly.
An installation project done properly may take hours and cost a lot, however, when it is done correctly the wallpaper can last several years. So if you’re going to take on the task yourself, make sure you do your research and obtain all the correct supplies. But better yet, let a professional installer hang wallpaper in your home.
Looking For Wallpaper Installers?
Once you have estimated how much your wallpaper installation will cost, next, you must find professional Wallpaper Installation Toronto.
Apex Wallpaper has years of expertise in installation. And whatever type of wallpaper project you are working with, we can help with your wallpaper project to achieve an outcome in the first session. Call us now for more information on our wallpaper installation service and get free estimates.
Don't forget - with wallpaper, you can overhaul your rooms and make them reflect your unique tastes!
The pleasantness of a home relies heavily upon its walls. Usually, the next step after removing the old wallpaper is fixing the drywall that has also been ripped off. All that effort stripping the wallpaper likely left wrinkles and dents on your walls because no primer or plaster was used on the initial installment of the wallpaper.
Drywall mending can be addressed with a few materials, a drywall/joint compound, and patience. Here's a guide to instruct you how to repair drywall damage.
How To Repair Damaged Drywall
Make sure that you have the tools and materials needed for the job, such as:
- Paint roller and brush
- Drywall knife
- Taping knife
- Trowel
- Shellac-based or oil-based primer/sealer
- Wallpaper paste remover
- Vinegar
- Sponge
- Cloth
- Sandpaper of various grit sizes
- Joint compound
Clean the Walls and Remove Loose paper
It is vital to ensure that you deal with all the residue. Clean the wall with a wallpaper paste remover or a mixture of 1 part vinegar to 4 parts water to clear all the glue lumps. Don't saturate your walls; you will only add to the problem if you overdo it.
Then, with a drywall knife or solid utility knife, scrape off traces of some loose brown paper, or the loose edges of the wallpaper.
Sand The Ripped Drywall
Smooth the rough areas of the drywall surface or plaster with medium-grit sandpaper, then lightly sand with a fine-grit sandpaper. This will create a smoother foundation for the drywall/joint compound. Wipe the sanding dust with a clean cloth.
Apply The Drywall Compound
Cover any grooves and drywall damage with a couple of applications of joint compound, available from any hardware store. You may use a short, broad putty knife, but a drywall knife is much better to spread the joint compound a few inches past the borders of the damage so you can sand it level with the facade once you're finished. Try to prevent leaving creases or huge lumps.
Allow the compound to fully dry for about a day before sanding it down.
Sand The Fixed Areas
Sand the walls with an electric sander (make sure to wear a dust mask). Use a fine 100-grit sandpaper and a sanding block to smooth off the surface.
If the wall is still dented or uneven, remove all the dust from the wall, then spread another coat of joint compound. Then polish it off with a fine-grit 180 sandpaper after waiting the suggested length of time again.
Apply Primer
Once the entire wall is completely dry, use oil- or shellac-based primer. This coat of primer creates a smooth surface for your paint to adhere to and ensures an even finish.
Another Method To Fix Damaged Drywall Paper
If the damage to your drywall after removing wallpaper is extensive and severe, a simple patch job might be insufficient. Another critical measure in this process that frequently gets neglected is skim coating.
What Is Skim Coating?

Skim coating is a technique that hides imperfections and eases damaged walls and ceilings by applying a thin application of joint/drywall compound (or drywall mud). The skim coating process is closer to drywall finishing than priming or painting because of the needed two-skim coats for the best results.
How To Skim Coat Drywall
- Scrape away the remaining wallpaper bits and torn drywall paper. Cover up areas that will not be skim-coated.
- Apply the first coat of joint compound with a roller. Spread the mixture thinly (at least 1/32 inch). Be consistent across the surface.
- Smooth the mud with a taping knife or trowel. Then allow the first skim coat to dry completely.
- Apply a second coat over the entire surface to blend the missing-paper area with the surrounding drywall material.
- After the last coat dries, sand the wall with fine-grit paper.
Hire Wallpaper Removal Professionals!
Repairing the drywall after you remove wallpaper is essential. The problem may reappear after installing the new wallpaper or painting if left unaddressed. But it's a project that is backbreaking, and taking on such a project on your own might not be a great idea if you lack expertise. Although you enjoy working on things yourself, this big job usually becomes more complex, and even tiny missteps can slow you down immensely.
Therefore, it's best to ask the help of an expert. Apex Wallpaper offers wallpaper removal and installation across Toronto, Ontario, CA. Our methodic wallpaper installation services prevent damage to the underlying drywall, and our preparation and installation services recover your wall with no massive clutter and complications.
Call us at 416.833.1662 for more information on our services, or email info@apexwallpaper.ca
Quotes or an estimate can be provided at request.
DIY projects are a great way to customize and decorate a home or space, especially when you're on a budget. If you're looking for an alternative way to decorate furniture or spruce up your dull tables and wardrobes, wallpaper is a material to have on hand.
As strange as it may appear, patterned wallpaper isn't only for walls. Decorative paper can actually be a fun and creative way to rejuvenate your pieces of furniture or your doors without breaking the bank. Whether you have excess paper lying around, redoing your space and need a pop of colour, or are looking for a focal point, this is your sign to get your furniture looking its best!
Getting Ready To Decorate Furniture
So you've decided that you want to wallpaper your wood furniture and bring it new life with this great project, but now you don't know where to start. Like with any other DIY project, one of the first things you should do is look for inspiration before you start creating.
Find Your Inspo
What do you want your furniture to look like? What colours, patterns, or styles are you looking for in your room? Do you want to work with glass or wood? What's the right wallpaper for your aesthetic? Do you have a specific colour palette in mind? Are you looking to upcycle a dresser, wardrobe, or table? Looking through DIY blogs, Pinterest, and other sites can bring you tons of wallpaper inspiration that will help you get started on your project.
Wooden and glass surfaces work great with this kind of project, so look around for pieces in your home or office that might need some new energy.
Gather Materials & Take Measurements
Once you have an idea of what you want to do, it's time to gather your supplies. In order to make sure you have enough paper, you'll want to measure the furniture. The paper should cover the surface and fold under the corners in order to create a seamless look.
You can grab all the supplies you need to decorate a dresser, doors, or wardrobe at your local hardware store. Besides a roll or two of wallpaper with decorative elements, you'll likely need a craft knife, sand paper, soft cloth, plastic squeegee, foam roller or a paint brush, finish, and some paint if you're hoping to do some painting as well.

Prep Your Surface
Whether you're working on the drawer fronts of a dresser, a table top surface, a back panel, or an entire piece of old furniture, you want to make sure that the surface is a bit rough and completely dry.
Start by filling in any old hardware holes and sanding the drawer front or table top until it has a bit of a rough finish. This will help the wallpaper stick to the furniture and look amazing.
Then, give it a wipe down with a damp cloth so that the surface is clean and rid of any dirt. When all the drawers or surfaces are dry, you will be ready to apply the wallpaper.
If you're painting any part of the furniture, you should do that before applying wallpaper to avoid getting paint on the paper.
Apply The Patterned Wallpaper
If you opt for peel and stick wallpaper, the next step is pretty straight forward. Working with smaller pieces of paper for smaller drawers and surfaces, peel the backing and stick the paper where you want it, making sure it has a completely smooth finish and does not have any air bubbles.
To smooth it out, run a craft knife blade, straight edge, or other hardware over the paper until the air bubbles are gone and the edges are firmly stuck to the surface.
If you are using more traditional wallpaper, you will need to cover the top, edges, and corners with wallpaper glue or mod podge.
Then, apply the wall paper all the way down the surface, smoothing it out as you go. You will also need to smooth out the air bubbles with a blade.
Finishing Touches
After you have applied the peel and stick wallpaper or glued down your paper, you're almost done!
To finish the look, trim the edges to make sure there isn't any extra paper hanging off the frame. Once this has been done, you're all set to place the furniture.
The entire room will feel brand new with this DIY! You'll be dreaming of making these personalized and decorative pieces for every room in your home.
Most interior decorators and home improvement professionals will agree that removing old wallpaper is the most viable option to remodel a room instantly, rather than painting over it. Removing wallpaper is not a tough job; it's just time-consuming and back-breaking. The right wallpaper removal tools and techniques can significantly reduce the effort you should exert, even for the most stubborn wallpaper.
Assess Your Wallpaper
Figure out what type of wallpaper you're working on - removable, strippable, waterproof, or vinyl wallpaper – as the time it takes to remove may depend on it.
For example, in some instances, a strippable wallpaper can be easily removed by using a putty knife, and without water or chemicals. And simply peel it away at a corner or under a switch plate. You may go to this link to learn more.
You might often encounter vinyl-coated wallpaper (wallpaper backing), paper with a waterproof top layer, or professionally installed one that won't peel from the wall with a simple tear because of the wallpaper adhesive used. In cases like this, scoring the paper first is necessary before proceeding with the scraping process.
Wallpaper Removal by Scoring
Step 1. Properly Prepped Your Walls And The Room
Some things within the room might get wet and sticky. So, before starting, remove all wall decorations, picture frames, and any furniture blocking your entire wall. Likewise, if you have big lamps extruding in the wall, you'll need to remove those. Unscrew the light switch and electrical outlet covers, and turn off the electricity supply to the room you are working in.
With wide painter's tape, tape plastic along the baseboard. It will prevent shreds of dropped wallpaper from coming into contact with your baseboards, saving the carving from damage and you from needing to take off the paper once more.
Water and detergent solutions can stain floors. Protect your floor with absorbent rags or drop cloth. The tape along the baseboard will also keep water or solvent from dripping onto the floor and chair rails.
Step 2. Dealing With Wallpaper Glue And Waterproof Wallpaper
Scoring means poking tiny holes in the paper so that your solvent can seep beneath to fulfill its function - to reach and soak the paste underneath.
The quickest, most straightforward way to do this needs one handy instrument – a wallpaper scoring tool that you can buy in your home improvement store. This tool's tiny teeth create several cuts into your drywall and plaster walls. It will expedite the time to remove challenging wallpapers, such as wallpaper glue and old or painted-over wallpapers.
However, a fork can also do the trick. Just ensure you utilize a fork that's ok to discard afterward.
How To Use A Scoring Tool?
Hold the wallpaper remover scoring tool against the wall surface. Using light pressure, roll the tool from corner to corner and floor to ceiling in a circular motion, allowing the wallpaper stripper to puncture.
If not used correctly, you might damage the teeth of the instrument and increase the risk of wall damage.
If you're using a fork, run that fork all over the surface of the wallpaper, scraping to produce as many dents as possible to lead the solvent off. The more holes you create, the better the stripper will access. But abstain from working strenuously.
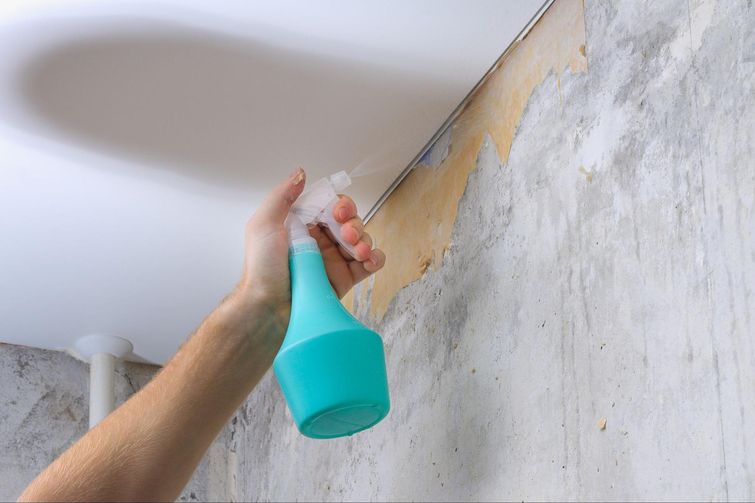
Step 3. Soak With Hot Water And Fabric Softener
Weaken the glue by mixing equal parts of fabric softener and hot water in a spray bottle. The mixture is the key to efficiently removing the paper. You may also use a solution of one part distilled white vinegar with two parts hot water.
Thoroughly saturate one section of the wall, starting at the top left and working your way down. Be sure to wear eye protection. And wait 10 to 15 minutes to penetrate the paper completely. Some walls have several layers of wallpaper, so be patient.
Note: You should work in a section of 4' at most, as this will help guarantee that the wallpaper remover solution does not dry out before you can scrape the paper and paste away. Moreover, drywall has a paper surface and saturating it longer than 15 minutes can cause permanent damage.
Step 4. Scraping the Old Wallpaper
Once the stripping liquid has completed its work and the glue loosens up, you must be able to remove the wallpaper effortlessly with a scraping tool or putty knife. Once it lifts, continue using your fingers to skin the paper from the wall.
Continue spraying the hot fabric softener-and-water solution onto the wall, if necessary, to further soften the stubborn paste underneath it.

Now, You May Remove Wallpaper Easily
Wallpaper removal is a long process yet an easy job. And now that we've explained how to score your wallpaper, you must be optimistic in proceeding with your wallpaper removal project.
Don't Worry! Apex Wallpaper has got you covered whether you need to score or simply scrape your wallpaper.
Regardless of the type of wallpaper project you are embarking on, we will complete the job flawlessly on the first attempt. Call us now if you need help removing wallpaper efficiently, and/or installing a new one. We'll be happy to assist!
Home improvements and makeovers have become quite the trend, especially since the start of the COVID-19 pandemic. Whether it's been painting every room in your house, buying or rearranging furniture, or looking for unique ways to customize your room, making upgrades and changes can be fun and also a good way to spend time with your family.
One thing you may have been looking into is paintable wallpapers. This product is exactly how it sounds: wallpaper that you can actually paint over. Isn't the whole point of wallpaper to avoid painting your walls? Technically, yes. But trust us, paintable wallpaper is fun and a great way to add a unique texture to any room in your home.
What To Use Paintable Wallpaper For
Paintable wallpaper can be used for various reasons:
- Replacing old wallpaper
- New kitchen backsplash
- For furniture
- Accent wall
- On the ceiling
- Applying to an entire room

Installing Paintable Wallpaper Is Easy
This type of wallpaper is installed like traditional wallpaper. Walls should also be prepped as they would before installing traditional wallpaper. This means you'll need to fill in any nail holes, remove any leftover wallpaper glue, and let everything completely dry. Once dry, you'll need to sand and smooth the wall and apply a primer. Let dry again.
Ensuring the walls are completely dry and prepped will make installing paintable wallpaper that much easier. You'll also want to have the following tools on hand:
- Razor knife
- Tape measure or ruler
- Pencil
- Wallpaper smoother
- Paint roller and tray
- Straight edge
- Spray bottle with water
- Sponge
First, you'll need to determine where to start. Draw lines on the wall with a pencil as a guide. You may also find it helpful to draw lines on the back of the wallpaper as a guide too. Next, put the wallpaper adhesive in a painting tray and use a wallpaper roller to roll it on the walls. Don't apply it to the entire wall. Do small sections at a time so it doesn't have time to dry. Start hanging the wallpaper at the top of the wall and work your way down. Use a wallpaper smoother to get rid of any bubbles/imperfections. Use your utility knife to trim any extra paper.
Repeat until you've covered the entire wall or room, whichever look you're going for!
Why You'll Love Using Paintable Wallpaper

People use textured paintable wallpaper to obviously add texture to a room and create a unique space rather than going for a more traditional look. This is why it's also a great option to use as a kitchen backsplash or one accent wall. Plus, there is a variety of different textures, patterns and designs to choose from to suit your preferences and goals.
After installation, you paint over it with your colour or colours of choice and the type of paint of your choice – gloss, semi-gloss, matte, etc. You don't need special paint to use with this type of wallpaper, however, you should let the wallpaper rest for 36-48 hours before painting it.
Can Paintable Wallpaper Be Used In The Bathroom?
While most wallpapers can hold up well in a bathroom regardless of humidity and moisture, it's best to test it out first. Cut a small sample and place it on the wall for about a week or two to see if it's held up well.
Paintable wallpaper makes for a great accent wall in a bathroom or as a sink backsplash.
Contact A Professional For Help
If you don't have time to remove old wallpaper yourself or install paintable wallpaper, contact a professional contractor like Apex Wallpaper. We're a Toronto-based wallpaper installation company that has been in business since 1998. We can efficiently remove old wallpaper, prep your walls, and install paintable wallpaper for you. We can also provide our expert advice on the best type of pattern and paint to choose that will work best for your home and design goals.
We can also discuss other types of wallpaper coverings such as peel and stick wallpaper, vinyl, liner, printed, and more. Whether it's for bathrooms, bedrooms, kitchens, or even ceilings, we'll help you make the right decision so your new wall covering will last for years.