Selling a home in Toronto can be competitive, and first impressions often play an important role in how buyers perceive a property.
If you're preparing your home for the market, you've likely considered decluttering, painting, and deep cleaning. However, one design element that is often overlooked during home staging Toronto projects is wallpaper.
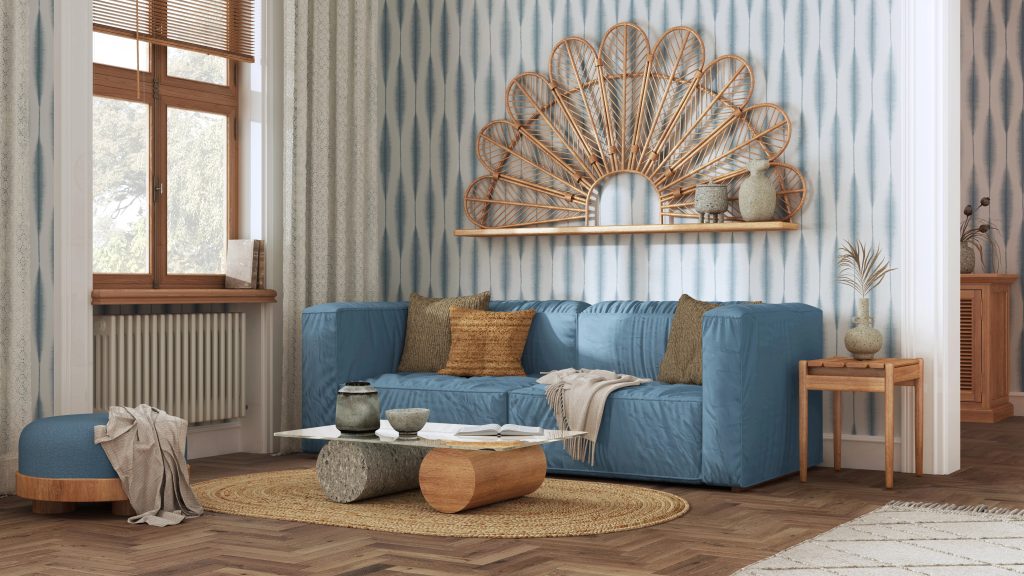
When thoughtfully selected and professionally installed, wallpaper can add character, texture, and visual interest to a space. As part of an effective home staging strategy, it can help create a polished appearance that stands out to prospective buyers.
Why Wallpaper Works for Home Staging in Toronto
Toronto buyers often view multiple properties before making a decision. Homes that feel thoughtfully designed and well-maintained tend to leave a stronger impression.
Wallpaper offers an opportunity to add depth, texture, and personality in ways that paint alone often cannot. Whether it's a subtle textured finish or a carefully chosen pattern, wallpaper can help create a more refined look throughout the home.
For homeowners considering wallpaper home staging, these design enhancements can help rooms feel more inviting, memorable, and visually appealing both online and during showings.
Where to Add Wallpaper Before You List
You don't need to wallpaper an entire home to make an impact. Strategic placement is often the most effective approach when preparing a property for sale.
The Entryway
The entryway is one of the first spaces buyers see when they enter a home. Adding wallpaper here can create a welcoming atmosphere and establish a strong first impression that carries throughout the rest of the property.
The Primary Bedroom
The primary bedroom is often a focal point for buyers. A feature wall with a soft pattern or subtle texture can create a relaxing, finished appearance while helping the room feel warm and inviting.
The Dining Room
Dining rooms can sometimes feel underutilized or overlooked. Wallpaper can help define the space, add visual interest, and create a more intentional design that enhances the overall presentation of the home.
The Powder Room
Small spaces often provide excellent opportunities to introduce wallpaper. A well-designed powder room can leave a lasting impression, and wallpaper offers a simple way to add style and character without overwhelming the space.
How Wallpaper Can Help Increase Home Value
For homeowners looking to increase home value, Toronto buyers may recognize and appreciate presentation matters. Well-staged homes often attract greater attention from prospective buyers, and wallpaper can be a cost-effective way to enhance a property's overall appeal.
Here's why wallpaper can be beneficial before listing a home:
It Differentiates Your Listing
Many homes feature neutral paint colours and similar finishes. Wallpaper can introduce visual interest that helps your property stand out and remain memorable to buyers viewing multiple listings.
It Signals Attention to Detail
Professionally installed wallpaper can contribute to a finished, high-quality appearance. Buyers often notice design details that suggest a home has been thoughtfully maintained and updated.
It Photographs Exceptionally Well
Online listings are often a buyer's first introduction to a property. Wallpaper can add texture and depth that translates beautifully in listing photos, helping rooms appear more visually engaging.
It's a Targeted Investment
Unlike major renovations, wallpaper can provide a noticeable visual upgrade without requiring extensive construction. Even a single feature wall can enhance the overall perception of a room.
What to Choose: Patterns, Textures, and Colours for Staging
When selecting wallpaper for staging, it's generally best to focus on broad appeal rather than personal preferences.
Subtle geometrics, soft botanical designs, and textured finishes are often excellent choices because they add visual interest without overwhelming the space.
Neutral colour palettes tend to work well in most rooms. If you'd like to incorporate a bolder design, consider limiting it to an accent wall or a smaller area such as a powder room.
The goal is to create a timeless, welcoming look that appeals to a wide range of buyers.
Why Professional Installation Matters Before You Sell
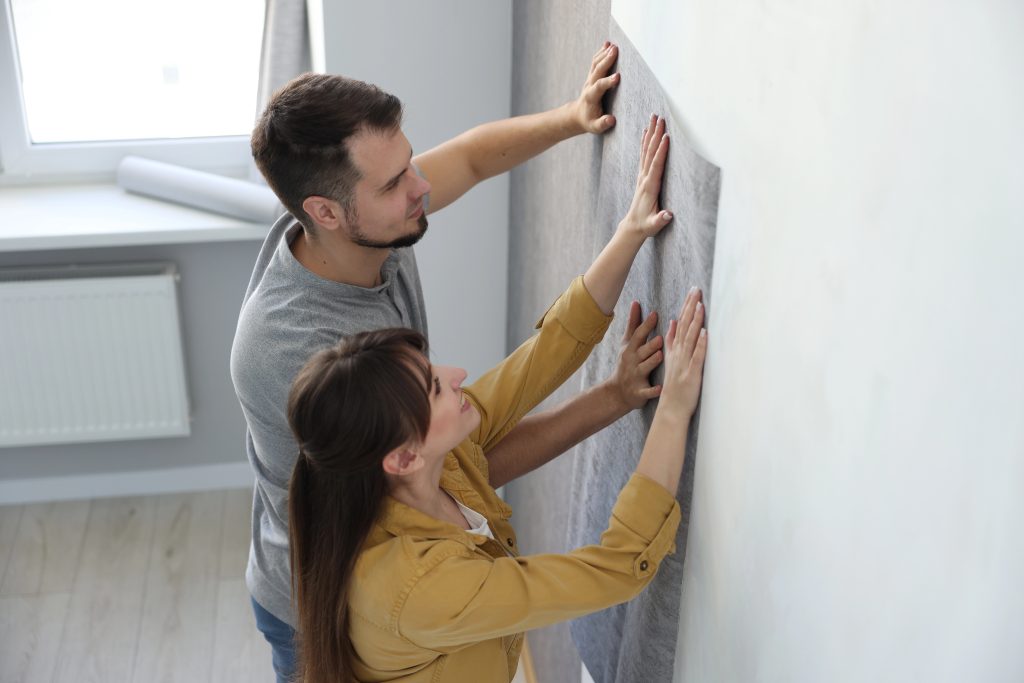
If you're considering wallpaper before selling your home, professional installation is essential.
Even high-quality wallpaper can have a negative impact if seams are visible, patterns don't align properly, or bubbles and lifting occur. Buyers often notice these imperfections, especially during showings.
Professional installation helps ensure clean lines, precise pattern matching, and a polished final result that complements the overall staging effort.
Ready to Increase Your Home's Value Before You Sell?
Wallpaper remains one of the most overlooked tools in home staging Toronto projects. Whether you're refreshing an entryway, upgrading a powder room, or creating a feature wall in the primary bedroom, wallpaper can help enhance your home's overall presentation.
If you're considering wallpaper before selling your property, Apex Wallpaper can help you choose the right design solutions for your space. Our experienced team provides professional installation services that help homeowners create a polished, memorable impression for prospective buyers. Get in touch today.
The kitchen is more than just a place to cook, it’s where daily routines unfold, conversations happen, and design choices can truly shape the feel of your home. Wallpaper offers a practical and visually striking way to elevate this space, introducing texture, pattern, and personality without the need for a full renovation. With the right selection, it can enhance everything from modern layouts to more traditional interiors while standing up to the demands of a busy kitchen environment.
Why Choose Wallpaper for Your Kitchen?
Wallpaper brings dimension and character to kitchen walls in ways paint simply can’t match. It allows you to create a striking feature wall behind open shelving, add pattern to a breakfast nook, or cover an entire space with a cohesive design.
Modern kitchen wallpaper materials are specifically engineered to withstand cooking moisture, splashes, and temperature changes, factors that typically make kitchens more challenging than other areas of the home.
Many Toronto homeowners are turning to wallpaper as a way to define their kitchen style without the cost or disruption of major renovations. With the wide range of patterns, textures, and finishes available today, it’s easy to achieve anything from farmhouse charm to sleek, contemporary elegance.

Best Materials for Kitchen Wallpaper
Vinyl Wallpaper for Kitchens
Vinyl wallpaper remains the top choice for kitchen applications. This durable material resists moisture, grease, and steam far better than traditional paper options, making it ideal for high-use areas.
Solid vinyl wallpaper offers the highest level of protection, with a fully waterproof surface that works well near sinks and prep areas. Vinyl-coated paper provides a balanced option, combining design flexibility with reliable durability.
Kitchen Wallpaper Design Ideas
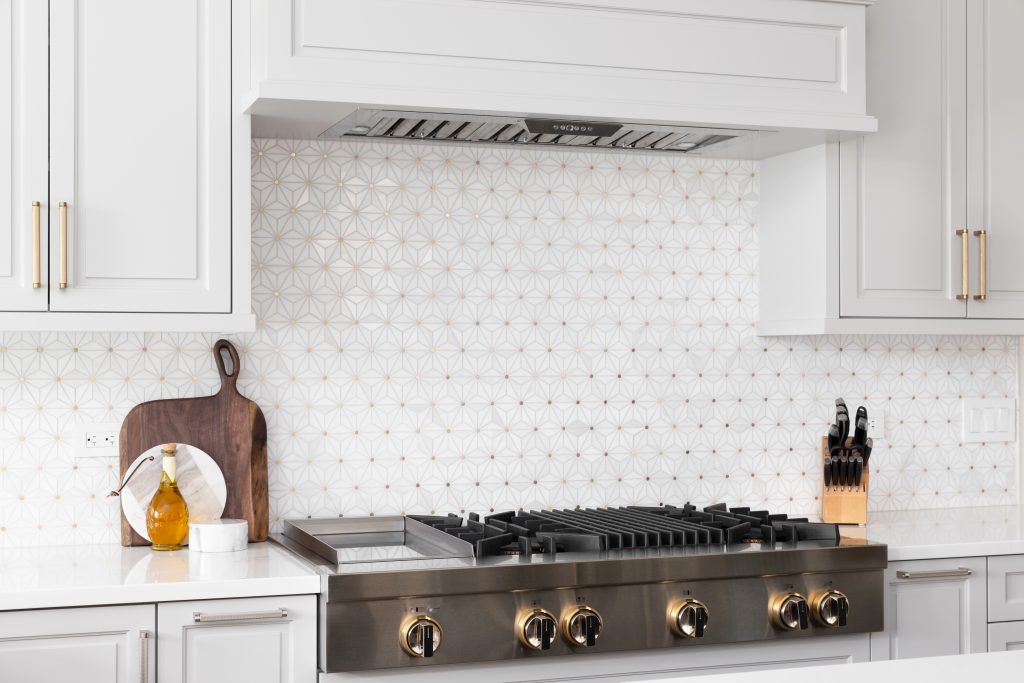
Feature Wall Impact
Creating a feature wall behind a kitchen island or dining area adds visual interest without overwhelming the space. Geometric patterns, botanical prints, or textured designs can complement cabinetry and countertops while adding depth.
Wallpaper with metallic accents reflects light effectively, helping smaller kitchens feel brighter and more open. Finishes in gold, silver, or copper can also introduce a subtle layer of sophistication.
Colour Coordination
Choose wallpaper colours that tie in with your kitchen’s existing elements. Neutral tones with subtle patterns provide a versatile backdrop, while bolder colours can serve as a focal point.
In open-concept Toronto homes, selecting wallpaper that visually connects with adjacent living areas helps maintain cohesion while still defining separate spaces.
Pattern Selection
Smaller-scale patterns work well in compact kitchens, adding interest without overwhelming the space. Larger patterns are better suited for kitchens with more square footage or higher ceilings.
Wallpaper designed to mimic classic subway tile offers the look of real tile without the complexity or cost of installation. This style works particularly well in modern farmhouse and transitional kitchens across the GTA.
Professional Installation Considerations
Surface Preparation
Proper wall preparation is essential for successful wallpaper installation. Surfaces should be smooth, clean, and free from grease or moisture before application. Even minor imperfections can show through, making professional preparation a key step in achieving a flawless finish.
Older Toronto homes, especially those with plaster walls, may require additional preparation. Professional installers understand how to properly treat different wall types commonly found in GTA properties.
Moisture and Ventilation
Kitchen ventilation plays a significant role in wallpaper performance. A properly functioning exhaust system helps reduce moisture buildup, protecting both the adhesive and the material over time.
Wallpaper should generally be avoided directly behind stoves or in high-splash zones unless using commercial-grade materials designed for those conditions.
Pattern Matching and Seams
Accurate pattern matching requires precision, particularly with large-scale or intricate designs. Professional installation ensures clean alignment where panels meet, resulting in a seamless, cohesive look.
Corners, edges, and areas around windows require careful handling. Proper techniques help prevent peeling and ensure long-term durability.
When to Call Professionals
While some homeowners choose to install wallpaper themselves, kitchens present unique challenges. Moisture exposure, material selection, and precise application all require a higher level of attention.
Professional installers bring the right tools, experience, and techniques to avoid common issues such as bubbling, misalignment, or premature peeling. They also complete the project efficiently, minimizing disruption to your daily routine.
Transform Your Toronto Kitchen Today
Kitchen wallpaper offers a practical way to refresh your space with added style and personality. From durable vinyl materials to thoughtfully selected patterns, the right choice can elevate your kitchen while meeting everyday demands.
Apex Wallpaper brings over two decades of professional installation experience to homeowners across Toronto and the GTA. Our team works with a wide range of wallpaper materials, delivering clean, precise results tailored to your space. Contact Apex Wallpaper today for a free quote and take the next step toward transforming your kitchen.
Kitchens and bathrooms are high-moisture environments that can challenge traditional wall coverings. Waterproof wallpaper offers a solution by using materials and surface treatments designed to resist humidity and occasional water exposure, providing a durable and easy-to-clean surface suitable for these spaces.
What Makes Wallpaper Waterproof?
Waterproof wallpaper isn't just regular wallpaper with a coating. It features specialized materials designed to resist moisture penetration.
Most waterproof options use vinyl or vinyl-coated surfaces. These materials create a barrier that prevents water from reaching the wall beneath. Some products feature solid vinyl construction, while others combine a vinyl layer with a fabric or paper backing.
The key difference is in the surface treatment. Standard wallpaper absorbs moisture, leading to peeling, mold, and deterioration. Waterproof varieties repel water, making them suitable for high-humidity environments.
Why Kitchens Need Moisture-Resistant Walls
Your kitchen faces constant moisture challenges. Steam from cooking, splashes from washing dishes, and general humidity create an environment where standard wallpaper struggles.
Waterproof wallpaper handles these conditions effectively. It resists steam buildup that occurs during cooking and stands up to occasional splashes near sinks and prep areas.
The material also simplifies cleaning. Grease splatters and food residue wipe away easily from waterproof surfaces. This makes maintaining a fresh appearance straightforward, even in busy cooking spaces.
You gain design flexibility, too. Waterproof wallpaper comes in countless patterns, colours, and textures. You can achieve looks ranging from subway tile to modern geometric patterns without traditional tile installation costs.
Bathroom Applications and Benefits
Bathrooms present even more significant moisture challenges than kitchens. Shower steam, sink splashes, and general humidity create conditions that demand waterproof solutions.
Waterproof wallpaper works well in specific bathroom zones. It's ideal for areas away from direct water contact — walls opposite the shower, spaces above wainscoting, and powder room applications.
However, understanding limitations matters. Direct shower spray requires different solutions. Waterproof wallpaper excels in areas that experience humidity and occasional moisture but shouldn't replace tile or other materials in constantly wet zones.
The aesthetic benefits are substantial. You can introduce bold patterns, rich colors, or subtle textures that transform standard bathroom walls into design features. This creates visual interest without the expense and disruption of tile work.
Installation Considerations You Should Know
Proper installation determines how well waterproof wallpaper performs. Surface preparation is critical — walls must be clean, smooth, and properly sealed before application.
The installation process differs from standard wallpaper. Waterproof varieties often require specific adhesives formulated for vinyl materials. Some products feature peel-and-stick backing, while others need traditional paste application.
Seam placement requires careful planning in moisture-prone areas. Professional installers ensure seams align properly and create tight bonds that prevent moisture infiltration. Poor seam work compromises the waterproof properties.
Ventilation also matters. Even waterproof wallpaper benefits from adequate air circulation. Proper bathroom fans and kitchen ventilation help maintain the installation long-term.
Maintenance and Longevity
Waterproof wallpaper requires minimal maintenance but benefits from regular care. Wipe surfaces periodically with a damp cloth to remove dust, cooking residue, or soap buildup.
Avoid abrasive cleaners that can damage the protective surface. Gentle, pH-neutral cleaning solutions work best. For stubborn spots, warm water and mild soap typically suffice.
Check seams occasionally for any lifting or separation. Early detection allows for simple repairs before moisture reaches underlying surfaces. Professional installers can address minor issues before they become major problems.
With proper care, quality waterproof wallpaper lasts for years. Many products carry warranties ranging from five to fifteen years, reflecting their durability in appropriate applications.
When Professional Installation Makes Sense
DIY installation is possible with waterproof wallpaper, but professional installation offers distinct advantages. Experienced installers understand moisture management, proper adhesive selection, and seam placement techniques.
Professional installation ensures warranty coverage. Many manufacturers require a professional application for warranty validity. This protection proves valuable if issues arise.
The investment in professional installation often pays off through superior results. Proper technique prevents common problems like bubbling, lifting, or moisture infiltration that compromise appearance and performance.
Making Your Decision
Waterproof wallpaper offers a practical way to bring style into kitchens and bathrooms without sacrificing durability. It handles moisture better than standard wallpaper while providing more design options than paint alone.
Consider your specific space when evaluating options. Areas with high humidity but minimal direct water contact are ideal candidates. Combine waterproof wallpaper strategically with tile or other water-resistant materials in the wettest zones.
Professional installation ensures you get the full benefit of waterproof wallpaper's features. Ready to transform your kitchen or bathroom with a moisture-resistant style? Contact Apex Wallpaper for expert installation throughout Toronto. Our team brings the experience needed to deliver lasting results that enhance your space.
Wallpaper has the power to completely transform a room, adding texture, personality, and a polished finish that paint alone can’t achieve. But achieving that flawless look isn’t always as simple as it seems. Small missteps during installation — like poor preparation or misaligned patterns — can quickly turn a promising project into a frustrating and expensive outcome.
Even seasoned DIYers can run into challenges that affect both the appearance and longevity of their wallpaper. Understanding where things typically go wrong helps you avoid costly errors, protect your investment, and achieve a result that truly enhances your space.
Skipping Proper Wall Preparation
Surface preparation plays a major role in how well wallpaper adheres and how long it lasts. Many DIY installers rush into hanging paper without properly addressing the wall underneath.
Walls should be thoroughly cleaned to remove dust, grease, and debris that can interfere with adhesion. Any leftover residue may create visible bumps once the wallpaper is applied. Imperfections like holes and cracks need to be filled with spackle and sanded smooth. Even small flaws can show through, particularly with lighter shades or thinner materials.
Priming is another essential step that often gets overlooked. A primer ensures even adhesion across the surface and makes future removal much easier. Whether you're working with new drywall or previously painted walls, skipping primer to save time often leads to peeling and wasted materials later on.
Measuring and Cutting Incorrectly
Inaccurate measurements can lead to wasted wallpaper and noticeable installation issues. One of the most expensive errors is failing to account for pattern repeats, which affect how much material each strip requires.
Always measure wall height and add at least four inches for trimming. For patterned wallpaper, the repeat length must be factored into the total amount needed. Running out mid-project can mean ordering from a different dye lot, resulting in subtle but visible colour differences.
Cutting also requires precision. Sharp blades are essential for clean edges, while dull ones can tear the paper and create uneven seams. Many professionals cut all strips in advance to maintain consistent pattern flow across the wall — an important step that helps ensure a cohesive final look.
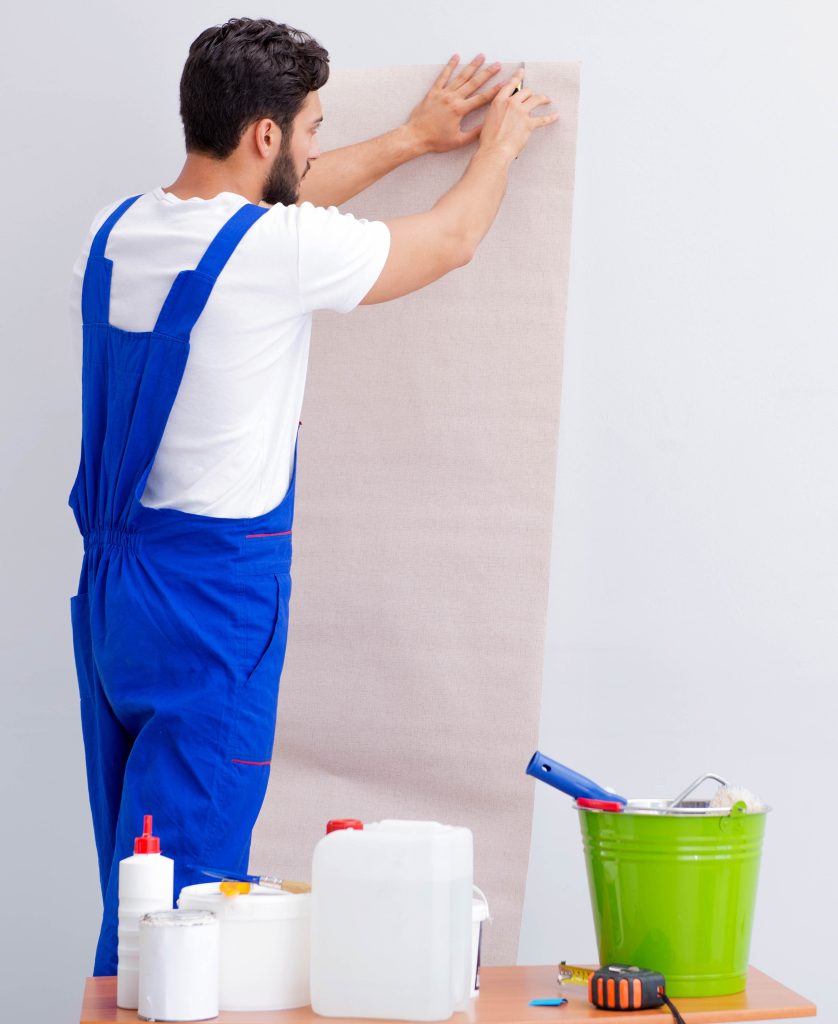
Using Wrong Adhesive or Application Methods
Choosing the correct adhesive is critical, as different wallpaper types require specific products. Using the wrong one can lead to immediate failure or gradual peeling over time.
Pre-pasted wallpaper must be activated with water at the proper temperature, while unpasted options need adhesive suited to their material and weight. For example, vinyl wallpaper requires a vinyl-specific paste, and heavier textured papers need stronger formulations. Manufacturer guidelines are there for a reason, yet they’re often ignored in favour of convenience.
Application technique is equally important. Excess adhesive can cause slipping and longer drying times, while too little may result in weak bonding. Professionals also understand proper “booking” time — the waiting period that allows the paper to absorb moisture and become flexible before installation.
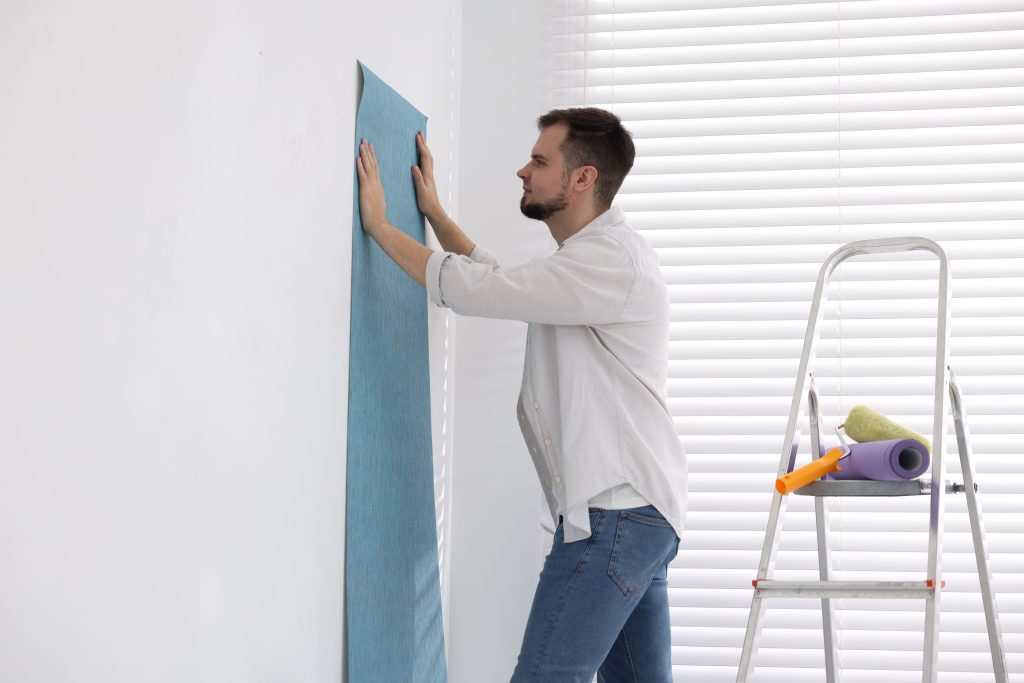
Rushing Through Installation
Impatience ruins more wallpaper projects than any other factor. Hurrying through installation creates air bubbles, misaligned patterns, and wrinkled seams that compromise your finished appearance.
Each strip demands careful positioning before smoothing begins. Working from the centre outward using proper smoothing tools eliminates air pockets systematically. Methodical work produces better results than speed, with each strip requiring perfect alignment before moving forward.
Proper drying time between strips and before trimming edges prevents problems many homeowners create by working too quickly. Wet wallpaper stretches, and premature cutting results in gaps appearing as material dries and shrinks to final dimensions.
Ignoring Pattern Matching at Seams
Mismatched patterns announce amateur installation instantly and ruin otherwise beautiful walls. This mistake happens when installers fail to plan starting points or don't align designs carefully during hanging.
Installation should begin at focal points or least noticeable corners depending on your room layout. Drop-match patterns require offsetting each strip, so understanding your specific pattern type before starting prevents costly errors. Holding new strips against previous ones before applying adhesive verifies pattern alignment and prevents mistakes.
Eye-level seams receive the most scrutiny, making pattern matching especially critical at these locations. Seam rollers help edges bond properly without flattening wallpaper texture, but overworking seams damages paper surfaces and creates visible problems.
Attempting Complex Projects Without Professional Help
Some wallpaper installations exceed typical DIY capabilities. Textured wallpapers, large-scale patterns, ceiling applications, and challenging architectural features require specialized expertise and equipment.
High ceilings, multiple corners, or expensive designer wallpaper make professional installation the smarter investment. Ruined materials often cost more than hiring experienced installers who guarantee perfect results. Professionals bring specialized tools and proven techniques developed over years of experience handling every wallpaper type and installation challenge.
Choose Professional Installation in Toronto
Avoiding common wallpaper installation mistakes can make the difference between a polished, long-lasting finish and a frustrating result. Proper preparation, accurate measurements, suitable materials, and a patient approach all play a role in achieving a professional look.
Apex Wallpaper has served Toronto and the GTA for over 20 years, working with everything from standard wallpaper to luxury hand-printed designs. Our team installs vinyl, acoustic wallpaper, grass cloth, fabric wall coverings, and specialty films with careful attention to detail. Every residential and commercial project is backed by a 100% satisfaction guarantee.
Don’t risk expensive materials on an inexperienced installation. Work with a professional team to ensure clean lines, seamless patterns, and results that enhance your space for years to come.
Wallpaper is an investment. Whether you went with a bold geometric print in the dining room or a subtle texture in the entryway, you want it looking sharp for years — not faded, peeling, or streaky after one bad cleaning attempt.
The good news: wallpaper maintenance is straightforward once you know what type you're working with. The bad news: plenty of homeowners skip that step and end up with water damage or lifted seams from the wrong cleaning method. Here's how to do it right.
Know Your Wallpaper Type Before You Touch It
This is the single most important step, and it only takes a minute.
Vinyl wallpaper is the most common option in Canadian homes and the easiest to clean. It holds up well to damp cloths and mild soap solutions. You can scrub lightly without worrying much about damage.
Coated fabric wallpaper often has an acrylic or vinyl layer on top, which makes it washable. Treat it similarly to vinyl, but go easy on the scrubbing.
Plain paper wallpaper is the delicate one. Getting it wet can cause warping, bubbling, or colour bleeding. Spot-clean only, using as little moisture as possible.
If you're not sure what you have, check the original packaging or the manufacturer's product page. If that's not available, do a small patch test in a hidden corner — dampen a cloth, press it gently, and see how the wallpaper responds before cleaning the whole wall.

Regular Dusting: The Simplest Thing You Can Do
Dust settles on wallpaper just like it does on furniture. Over time, a layer of dust makes colours look dull and can work its way into the texture of the paper. Regular light dusting keeps that from happening.
Use a dry microfibre cloth or the soft brush attachment on your vacuum cleaner. Work from the top of the wall down in slow, even strokes. Do this every few weeks in high-traffic areas like hallways and living rooms — monthly is enough for bedrooms.
This one habit does more to preserve the look of your wallpaper than any deep clean.
How to Spot-Clean Marks and Stains
For everyday smudges, fingerprints, or light scuffs, start with the gentlest option and work up from there.
- Try a dry eraser first. A clean white eraser (like the kind used for pencil marks) can lift surface smudges off many wallpaper types without any moisture at all.
- For tougher spots, use a damp cloth. Wring it out thoroughly — you want it barely damp, not wet. Blot the stain rather than rubbing it. Rubbing spreads the mark and can damage the paper's surface.
- Add a drop of dish soap if needed. Mix a small amount of mild dish soap in warm water, apply with a cloth, and blot. Follow with a second clean damp cloth to remove any soap residue.
- Dry the area immediately. Use a soft dry cloth to absorb moisture. Don't leave any wetness sitting on the wallpaper surface.
Avoid bleach-based cleaners, abrasive scrubbers, and anything with harsh solvents. These will strip the colour or break down the adhesive underneath.

Washing Vinyl Wallpaper
If your walls are vinyl and need a more thorough clean — say, in a kitchen where grease builds up — you can take a more direct approach.
Mix warm water with a small amount of dish soap or a gentle all-purpose cleaner. Use a soft sponge, wring it out well, and wash in sections from top to bottom. Rinse each section with a clean damp cloth and dry as you go.
Avoid soaking the seams. Water that gets behind the paper at the edges can loosen the adhesive over time, which leads to peeling. Light pressure along the seams, not scrubbing.
What to Watch For Between Cleanings
Keep an eye out for:
- Lifting seams at corners or edges, which usually means humidity or moisture is getting in
- Bubbling under the surface, which could be a sign of adhesive failure
- Fading near windows, where UV exposure is strongest
For seams that are starting to lift, a small amount of seam repair adhesive (available at most hardware stores) catches the problem early before it spreads.
The Bottom Line
Cleaning wallpaper doesn't require special products or a lot of time. Dust regularly, identify your wallpaper type before introducing any moisture, and treat stains as soon as they happen. Those three habits will keep your walls looking the way they did on installation day.
If you're unsure about your wallpaper's material or worried about damaging a high-end print, reach out to the team at Apex Wallpaper before attempting any wet cleaning. A quick conversation can save you a costly repair.
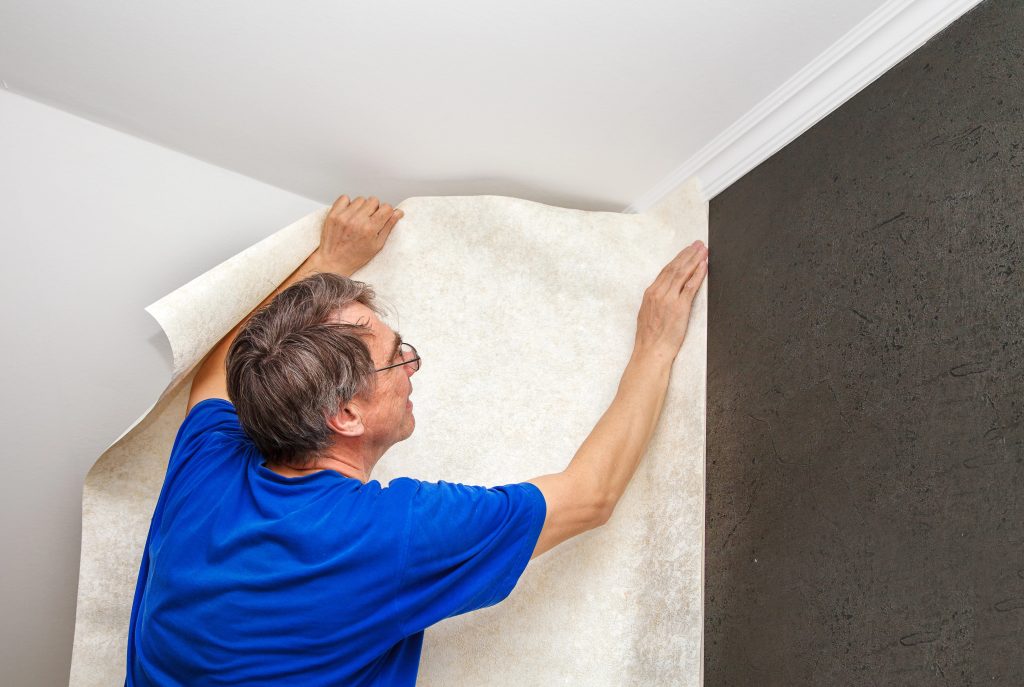
Removing old wallpaper can feel like a daunting project, especially if you’re worried about peeling paint, gouging drywall, or creating a bigger repair job than you started with. The good news is that with the right preparation, tools, and technique, wallpaper removal can be done cleanly and safely. Whether you’re preparing for fresh paint or a new wallpaper installation, following the proper steps will help protect your walls and create a smooth surface for the next finish.
At Apex Wallpaper, we regularly help homeowners across Toronto and the surrounding area refresh their spaces, and proper wallpaper removal is one of the most important first steps in achieving a professional result.

Step 1: Test Before You Start
Not all wallpaper is removed the same way. Some modern wallpapers are designed to peel off easily in full sheets, while older or heavily glued wallpaper may require moisture or steam to loosen the adhesive.
Start by gently lifting a corner using a putty knife. If the wallpaper pulls away cleanly, you may be able to remove most of it dry. If it resists or tears into small pieces, you’ll need to soften the adhesive before continuing.
Testing a small, hidden section first prevents unnecessary wall damage and helps you choose the safest removal method.
Step 2: Prepare the Room and Protect Surfaces
Before applying water or steam, take time to protect the surrounding space:
- Move furniture away from the walls
- Cover floors with drop cloths or plastic sheeting
- Tape plastic over baseboards and electrical outlets
- Turn off power to nearby switches if using liquid or steam
Proper preparation keeps cleanup simple and prevents moisture from damaging flooring or electrical components.
Step 3: Score the Wallpaper (If Needed)
For wallpapers that don’t peel easily, lightly scoring the surface allows water or removal solution to penetrate the adhesive underneath.
Use a wallpaper scoring tool and apply gentle pressure in circular motions. Avoid pressing too hard, as deep scoring can scratch or dent the drywall beneath the paper. The goal is to create small openings in the wallpaper surface — just enough to let moisture reach the glue.
Step 4: Soften the Adhesive
Warm water is often enough to loosen wallpaper paste, especially when mixed with a small amount of dish soap or wallpaper removal solution. Apply the liquid using a sponge, spray bottle, or roller, then allow it to soak for several minutes.
For stubborn or multiple wallpaper layers, a wallpaper steamer can be more effective. Steam gently heats and softens the adhesive, making removal easier without aggressive scraping.
Whichever method you choose, patience is key. Letting moisture fully penetrate the glue reduces the risk of tearing drywall paper or leaving deep gouges.
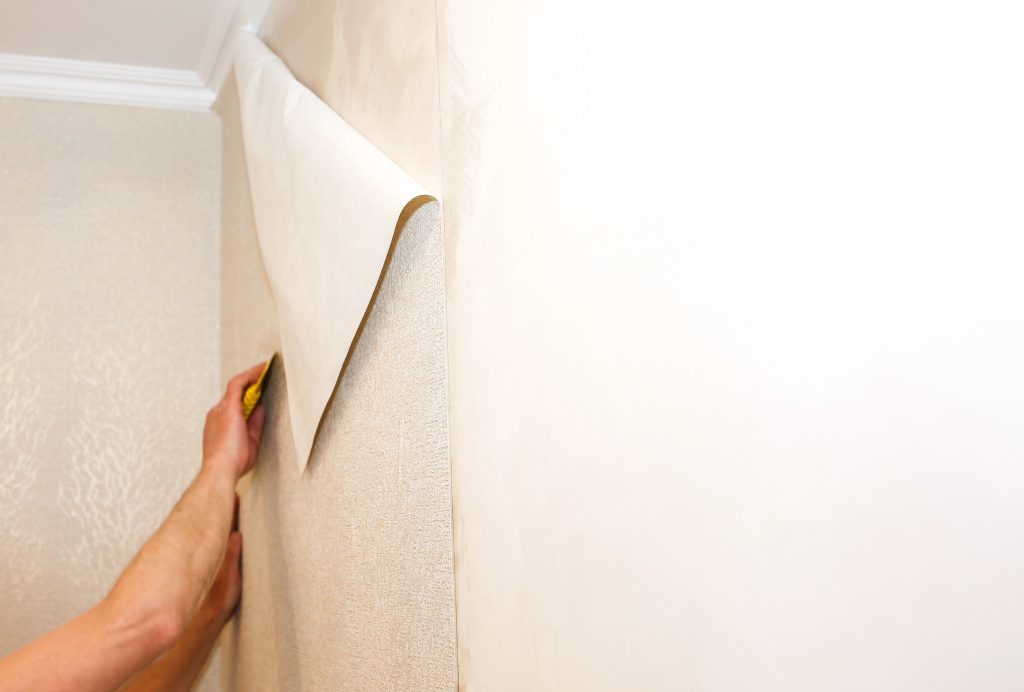
Step 5: Remove the Wallpaper Carefully
Once the adhesive softens, begin lifting the wallpaper using a wide putty knife or scraper held at a shallow angle. Work slowly and keep the blade flat against the wall to avoid digging into the surface.
If the wallpaper stops releasing easily, apply more moisture and wait a few minutes before continuing. Forcing dry sections is one of the most common causes of wall damage.
Removing wallpaper in manageable sections rather than rushing the entire wall helps maintain control and produce a smoother final surface.
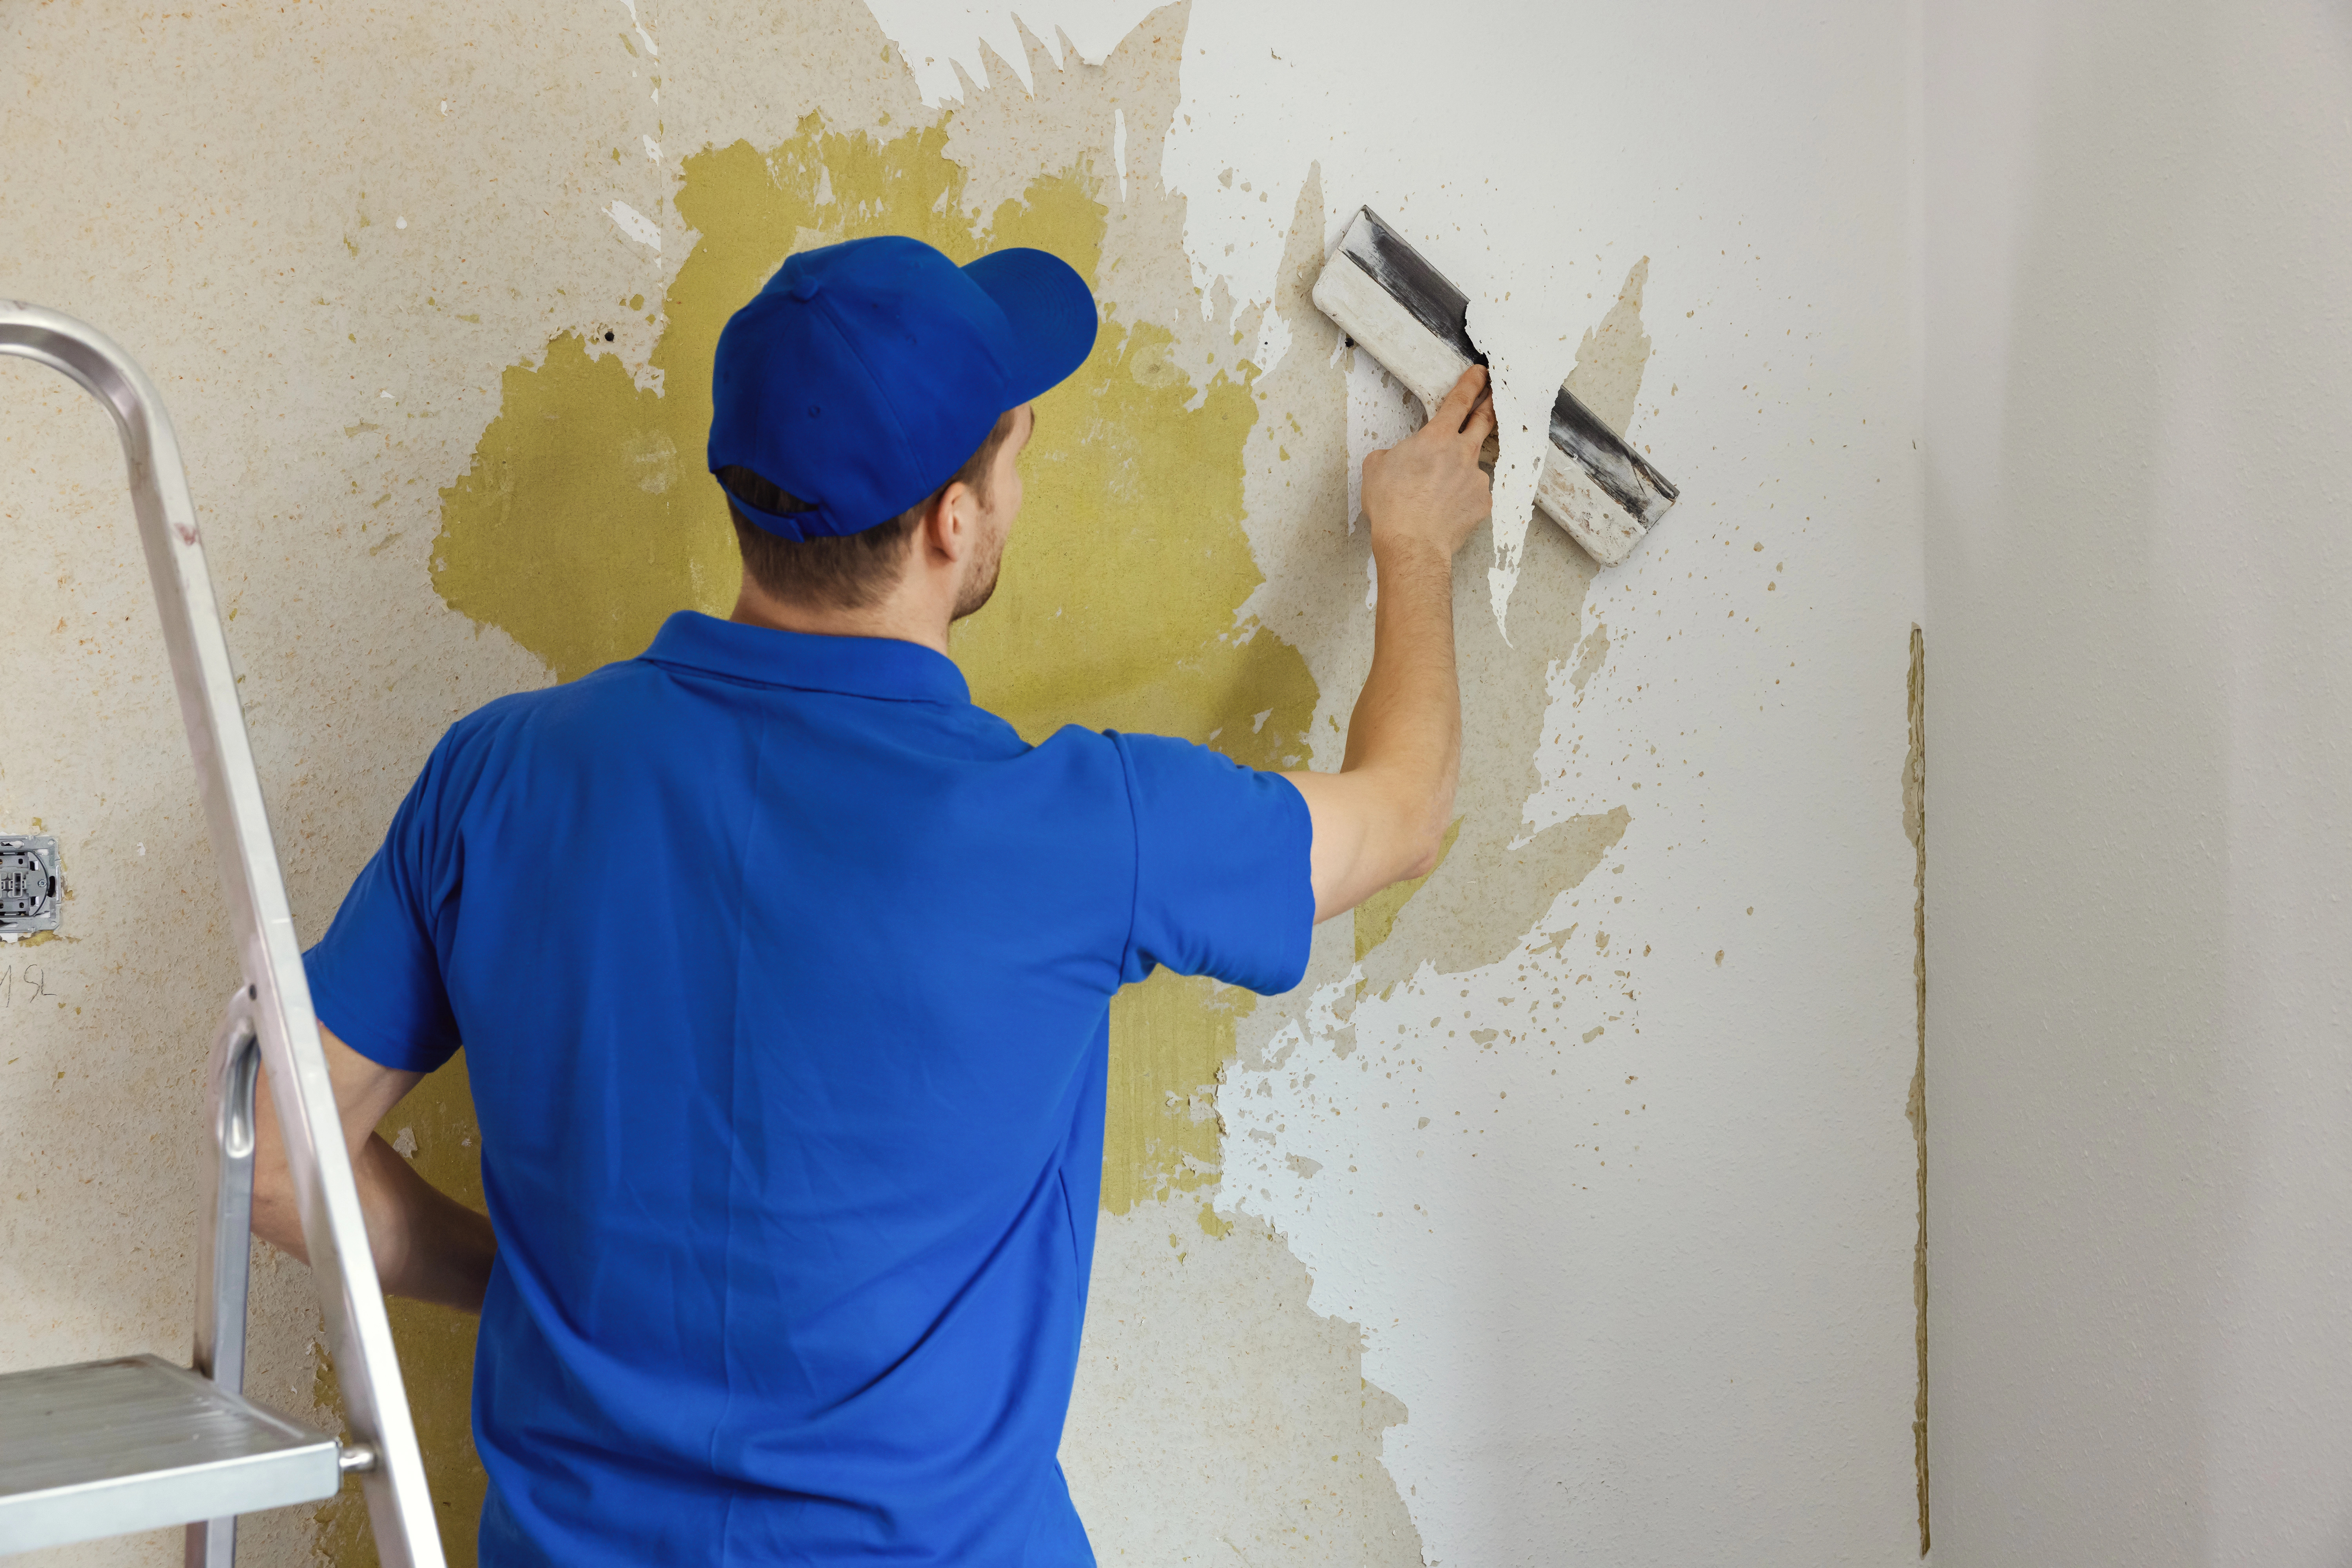
Step 6: Clean Off Remaining Adhesive
Even after the wallpaper is gone, leftover paste can interfere with paint or new wallpaper installation. Wash the walls using warm water and a sponge, rinsing frequently to remove residue.
Stubborn adhesive may require a dedicated wallpaper remover solution or a second light wash. Allow the walls to dry completely before assessing the surface.
Step 7: Repair and Prepare the Wall
After drying, inspect the wall for small nicks, lifted drywall paper, or uneven areas. Minor imperfections can be repaired using joint compound, followed by light sanding once dry.
Proper wall preparation is essential before painting or installing new wallpaper. A smooth, sealed surface ensures better adhesion, a cleaner finish, and longer-lasting results.
When to Call a Professional
While some wallpaper removal projects are manageable for homeowners, older wallpaper, multiple layers, or delicate drywall can make the process more challenging. Improper removal may lead to torn drywall facing, extensive patching, or uneven surfaces that affect the final finish.
Professional wallpaper specialists have the tools and experience to remove wallpaper efficiently while protecting the wall underneath — saving time, mess, and potential repair costs.
Refresh Your Walls With Apex Wallpaper
If you’re planning to update your space, Apex Wallpaper provides expert wallpaper removal and installation services throughout Toronto and the surrounding communities. From careful surface preparation to precise installation, our team helps ensure your walls look clean, smooth, and ready for their next transformation.
Contact Apex Wallpaper today to discuss your project and take the first step toward beautifully refreshed walls.
A feature wall with wallpaper can change the look and feel of any room. It adds personality, depth, and excitement right where you want it most. Many people choose a feature wall because it is a simple yet effective way to get maximum impact. With so many wallpaper designs and textures available, you can easily create a statement that perfectly matches your style. Whether you want to brighten up a living room, add drama to a bedroom, or make a hallway more inviting, a feature wall with wallpaper gives you endless creative options.
Wallpaper offers one of the fastest ways to update a room. It can change the colour, texture, and overall mood of a space in a single day. Different patterns and materials create distinct effects, from bold murals that define a focal point to subtle textures that add depth. There are many practical options for using wallpaper beyond a single accent wall, and most can be adapted to various room styles and sizes.
(more…)
Creating a sustainable and health-conscious home starts with mindful design choices. Eco-friendly wallpaper offers a way to reduce environmental impact while improving indoor air quality and adding style to your living spaces. From recycled materials to natural fibres and non-toxic finishes, these options support both a greener planet and a healthier home environment.
(more…)
Choosing the right wallpaper pattern can transform your space, adding personality and style to any room. Whether you're after a bold statement or a subtle backdrop, the right design can completely change the mood and feel of your home. But with so many options available, it can be tricky to know where to start.
Your choice should reflect your taste while complementing the room's size, lighting, and purpose. From classic stripes to modern geometric prints, every pattern has a unique effect. By understanding what works best for your space, you can create a look that's both practical and visually stunning.
Understanding Wallpaper Patterns
The right wallpaper pattern strikes a balance between style and function. Patterns don’t just decorate walls – they set the mood, add personality, and bring visual rhythm to your space.
The Importance of Patterns in Interior Design
Patterns play a powerful role in shaping a room’s atmosphere. They can make a space feel larger or more intimate, calm or energetic. By adding depth and creating focal points, patterns help define the character of a room and make it truly memorable.
Common Types of Wallpaper Patterns
- Stripes create structure and can visually elongate walls.
- Florals introduce softness, charm, and a timeless touch.
- Geometric designs bring a crisp, modern edge.
- Textured patterns like faux brick, stone, or wood add warmth and a natural element.
Assessing Your Space
Before committing to a wallpaper pattern, step back and consider the room as a whole. Size, function, and existing décor all influence how a pattern will look and feel. A thoughtful choice ensures harmony rather than distraction.
Evaluating Room Size and Shape
Large-scale patterns shine in open rooms or on feature walls, creating impact without overwhelming. In smaller spaces, tighter or more delicate repeats keep the proportions balanced. Always check the pattern repeat so the design flows naturally across the wall.
Considering Room Function
The purpose of the room should guide your choice. Subtle, understated designs work well in high-traffic areas like hallways, where overly bold patterns can feel tiring. On the other hand, intricate or dramatic prints add coziness and character to living rooms or bedrooms.
Accounting for Existing Décor
Wallpaper should complement, not compete with, your furnishings and finishes. Pull colours from your flooring, upholstery, or artwork to create a cohesive palette. As a rule of thumb, stick to no more than three patterns in one space, tied together by at least one shared colour, to keep the look polished and unified.
Choosing the Right Pattern
The right wallpaper pattern brings balance and character to a room. When making your choice, think about how it interacts with the room’s size, lighting, and existing décor. A well-chosen design will feel effortless, blending function with style.
Bold Patterns vs. Subtle Designs
Bold patterns – like oversized florals or striking geometrics – make a statement and work beautifully as feature walls or in spacious rooms where they have room to breathe. Subtle, tone-on-tone designs, on the other hand, create a sense of calm and are ideal for bedrooms, studies, or smaller spaces where you want a softer look.
Geometric Patterns for a Modern Look
Geometric wallpaper is perfect for creating a sleek, contemporary vibe. From clean stripes to intricate repeats, these patterns add structure and visual energy. Smaller repeats tend to feel more flexible, working just as well in compact areas as they do in larger rooms.
Floral and Nature-Inspired Patterns
Floral prints bring freshness and charm, and their effect depends on scale and colour. Bold, oversized motifs add drama and energy to living areas, while smaller or muted florals create a relaxed, soothing atmosphere – perfect for bedrooms or cozy corners.
Customizing with Textured Wallpaper
Textured designs, such as grasscloth, embossed finishes, or faux surfaces like brick and wood, add dimension and sophistication. They work especially well when used strategically on an accent wall or in minimalist spaces where they can stand out without overwhelming the room.

Colour Coordination Tips
Choosing wallpaper that complements your room’s colour scheme creates a cohesive and inviting space. Focus on balance and harmony to avoid visual clutter.
Matching Colours with Your Room
Select wallpaper colours that reflect or contrast with your room’s dominant shades. For a light background with sparse patterns, use matching light wall paint, while bold patterns pair better with wall paint that matches the primary colour.
Creating Contrast with Patterns
Introduce contrast using bold patterns like animal prints or metallic designs as accent walls. Combine geometric, floral, or abstract patterns in varying scales, ensuring one common colour unifies the look and avoids discord.
Tips for Small and Large Spaces
Wallpaper can dramatically change how a room feels, whether you’re working with a cozy nook or an expansive living area. The key is to adapt patterns and colours to suit the dimensions and atmosphere of your space.
Enhancing Small Rooms with Patterns
In smaller rooms, lighter colours and delicate patterns help open up the space, making it feel airier and more inviting. Subtle designs that reflect light are especially effective, while overly busy or offset repeats can create visual clutter. If you want a touch of drama, try a bold feature wall, then balance it out with softer, lighter tones on the surrounding walls.
Using Patterns in Large Spaces
Spacious rooms give you the freedom to go big. Large-scale prints add impact and prevent the space from feeling empty, while darker colours can bring a sense of coziness and intimacy. If you prefer a brighter, more uplifting feel, choose bold patterns in lighter tones. To avoid a flat look, layer patterns thoughtfully. For example, pairing a statement wallpaper with smaller prints in upholstery or textiles for added depth and balance.
Common Mistakes to Avoid
Overwhelming the Space
In compact rooms, oversized prints can quickly dominate and make the space feel crowded. Opt for smaller-scale or more neutral designs to maintain balance and keep the look fresh.
Ignoring Lighting Effects
Lighting has a big impact on how wallpaper appears. Patterns in darker tones or matte finishes can absorb light, making a room feel dimmer. In areas with limited natural light, choose wallpapers in lighter shades or with subtle sheen to brighten and visually expand the space.
The right wallpaper does more than cover a wall – it sets the tone, enhances the mood, and reflects your personal style. From subtle patterns that open up smaller rooms to bold designs that make a statement in larger spaces, choosing wisely ensures your home feels both balanced and beautiful.
At Apex Wallpaper, we specialize in helping homeowners bring their design vision to life. Our team can guide you toward styles that complement your space, lighting, and décor seamlessly. Whether you’re after timeless elegance or a modern edge, we’ll help you find the perfect fit.
Ready to reimagine your walls? Contact Toronto wallpaper installation experts and discover how the right wallpaper can transform your home with style and ease.